logo Sign In

yotsuya

User Group
Members
Join date
2-Dec-2008
Last activity
6-Dec-2023
Posts
2,000

Post History

Post
#916062
Topic
Star Wars Trilogy SE bluray color regrade (a WIP)
Time

DrDre said:

I think Williarob and towne23 made some very good points. Having seen the color variations between different prints, we should accept we may never know what the colors looked like on the first interpositives. Mike Verta’s grading will probably be the best guess.

Ps. I will be busy moving to our new house, so there will probably be few updates for a few weeks.

I came to this conclusion a while back. I think the closest we can come to knowing what those original colors were are the Tech IB prints and the telecines made from the interpositives. I understand the Definitive Edition LD was from the original interprositives and that the GOUT is the DE (with the crawl and SD flyover replaced by the 77 version - probably the one they scanned for Empire of Dreams). I think that documentary is very useful for our purposes because it contains so many alternate clips. But it is just one source among many. Often when looking at production stills or documentaries, or photos of the original costumes, props, and models, you have to peer through a different lens. The way the image was captured on motion picture film and processed for release differs from how production stills are processed, how dailies are processed and images taken at other times and places differ in lighting as well as how they are processed.

I think that the only way to arrive at something close to how Lucas intended is to take the various prints and telecines and use them to determine what the original color timing might have looked like. I think the Tech IB prints are the most accurate from scene to scene, but they do not have accurate colors since they are tall too green. The prints made from the interpositive/internegative process are all 2-3 generations down and the colors need to be adjusted to take that into account. The telecines have their own problems - a lot since they were intended for broadcast or home video and they made some global adjustments and who knows what else. I think with the right sources we could arrive at something close. I think DrDre is pretty damn close. One thing that helps is that we have two other movies made at nearly the same time with many of the same props, that were telecined at the same time from similar quality sources. Unfortunately the Blu-ray is currently our highest quality source with the worst of the color problems and a lot of the other sources are not as available. It is quite a handicap to work with and considering that, there is some amazing work going on.
Post
#915339
Topic
Star Wars Trilogy SE bluray color regrade (a WIP)
Time

DrDre said:

yotsuya said:

Ah… searching for more pics led to this - http://cdn.moviestillsdb.com/sm/ba5c5aacb00c284692aa349bb8006836/star-wars.jpg

I’d say this is an ideal image for the Tatooine desert/R2-D2/C-3PO colors and the skin tones (though they are hard to see they are reddish and consistent with the blistering temps in Tunesia).

The problem is that the Tatooine desert has a different color depending on location, time of day, and weather conditions, and can range from more yellow, more red and brown. I’ve watched hundreds of production photos, and there’s something unique in all of them.

Ah, well when just looking at the natural color of the desert, don’t forget to check out all the more recent tourist photos of the old locations as well as Episode II (and those production photos). While I too have noticed some variation, the photos that have that distinct yellow tint do not look very natural and the other elements (such as R2) aren’t the right color in a lot of them. They also tend to have washed out or jaundiced skin tones. You need some red to the skin tones, just not as much as the DVD and Blu-ray have.

From what I’ve seen, that yellow color seems to be indicative of the 1977 production stills and can be found in more than just the desert scenes (like the Death Star, Blockade Runner, Cantina) and does not appear in the more modern photos taken in Tunesia. I don’t think that yellow color is reliable or accurate.

Post
#915332
Topic
Star Wars Trilogy SE bluray color regrade (a WIP)
Time

DrDre said:

clutchins said:

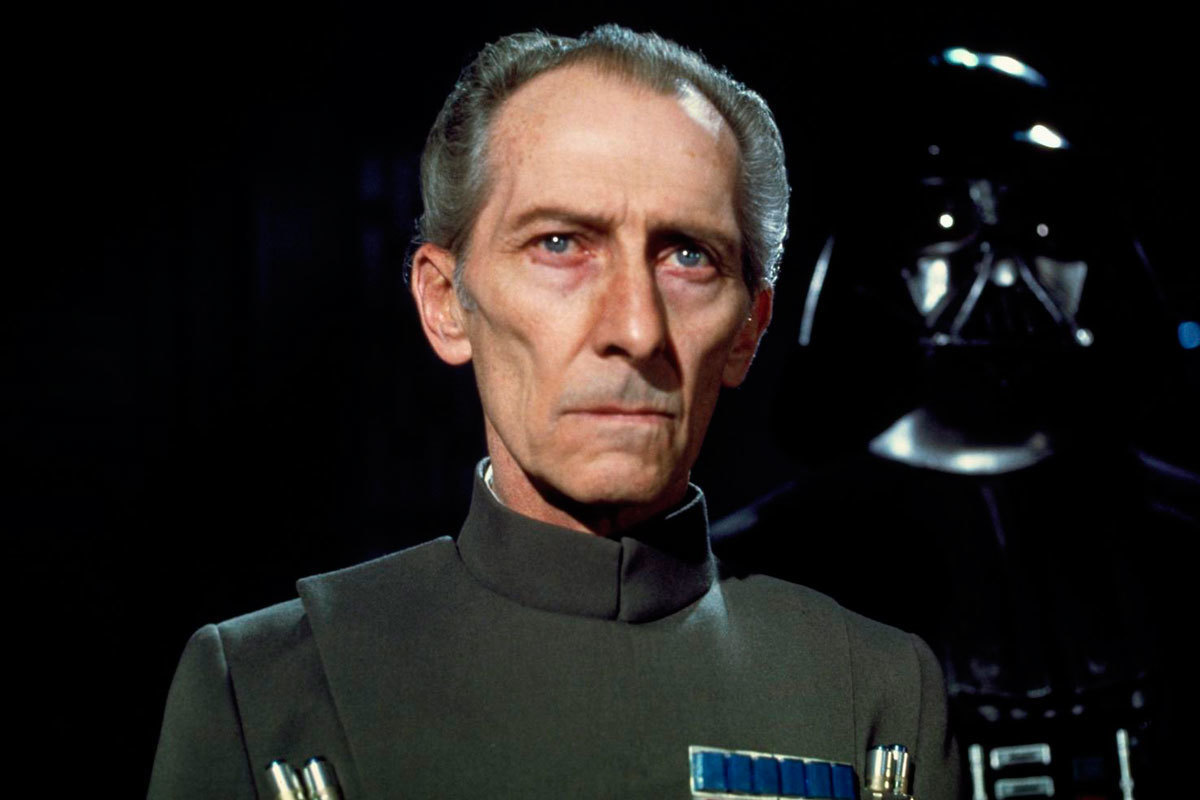
I think there’s still a bit of magenta noise on Cushing’s face.

This is not magenta noise. It is supposed to be present. Although the magenta was too apparent in earlier iterations, Peter Cushing had very thin skin, resulting in magenta blodges on his face, especially around the eyes:

I like this picture. The blodges are not so much magenta as reddish skin. It looks very natural in this image.

Post
#915320
Topic
Star Wars Trilogy SE bluray color regrade (a WIP)
Time

DrDre said:

The bluray certainly is the worst color reference to use, as it was heavily altered when it was digitally color graded to fit GL’s vision. There literally is nothing authentic in the bluray color grading, as it was scanned directly from the negative and completely regraded. The GOUT, just like any of the laserdisc masters was also regraded, where the brightness and contrast were adjusted on a scene by scene basis to fit the low contrast medium they were made for, so they do not correctly represent the variation in the grading between scenes. Take the JSC, where the R2 canyon scene was noticably brighter than on any print scans we’ve seen. The Technicolor print scans are definitely the most accurate source for both the colors and luminosity, despite the problems of green shifts and other issues that we know of.

The magenta and green blotches in the Tarkin frame are artifacts that are being corrected as I’m writing this. Many of the Tatooine are preliminary. The only gradings the are close to finished are on the first page.

Well, I agree that that the Technicolor print scan would be the most accurate provided I had a copy and it was a raw scan and the same settings were used for each reel. At present that is not something that is publicly available. Of the sources I have access to, I found the GOUT/Definitive Edition to be the most accurate. With the exception of the opening shot. I have become convinced that was scanned for the first DVD set special feature and edited on for the 2006 DVD release making it a higher generation than the rest (and it looks like it too). And I think you give them too much credit for adjusting scenes. I don’t think they put that much effort into it. I think the entire movie is supposed to be darker and I feel that TN1 SS edition really proves that.

Now, in the four examples you posted above, I find that R2 looks best in both the GOUT and JSC versions. I’m not sure how many R2’s there were or if they featured different paint jobs, but all the Tatooine outdoor shots feature a very bright blue R2 and all of the indoor set shots feature a very dark blue R2. I’ve found R2 to be a good guide as to how accurate the behind the scenes photos are and a great many of them are way off. If he is green, purple, or nearly black, the photo isn’t accurate. If he is bright blue or dark cobalt blue they are in the accurate range. C-3PO is also a good guide, but not as good. If he is too orange or too silver the image isn’t good. He should be a nice yellow gold just slightly to the brassy side instead of the elemental gold. But R2 is much more reliable such as in this behind the scenes photo - http://www.moviestillsdb.com/movies/star-wars-i76759/JcR6OH

Post
#915287
Topic
Star Wars Trilogy SE bluray color regrade (a WIP)
Time

DrDre said:

yotsuya said:

I really like how distinct it is from the Blu-ray it is. However, I think you have taken some of the shots too far. I know you are using reference shots but I think the reference shot have their own issues. I’m sticking with the GOUT and the LD’s as the closest we have to the original palet (telecined from Lucasfilm’s pristine print) and I found that if I layer the blu-ray and your color correction that it lands right where I think the colors should be. At least for the Tatooine scenes. I can’t see much wrong with the throne room shot.

And these are spot on for where I am right now trying to color correct them. I have by BR ANH color correction very close so I’m trying to bring the GOUT in line (which requires subtle tweaking) and then I am going to work on some of the troublesome scenes that I think Lucasfilm tinkered with in the HD master. I’m not after a 100% match, just close. These images are pretty on target for where I think these scenes should be.

I always use multiple sources for the regrade, mostly relying on print scans, and still frames, but also the home video releases at times, but I wouldn’t trust the GOUT as a color reference. It was made when the original negative and the interpositives were in very poor shape, and it obviously suffers from the typical 1990s pink/reddish skin tones. Although it is the version of Star Wars many of us remember, I doubt it looked like that in theatres in 1977.

Well, I think it has issues, but minor ones. The Tech IB prints are too green which means they are not accurate, the negative has faded so the Blu-ray is not accurate. The source material for the home video releases (the early ones, the Definitive Edition, the JSC) are all pretty close in most respects. Mostly the suffer from being too bright, lacking contrast. Much easier to fix than the color issues of the other sources. I also feel that they are the most accurate representation of the color variation from scene to scene in the original print. Something I think might be lost by color correcting each scene individually. Now, the Blu-ray does need that individual touch, because we have no idea what color grading they used when they scanned the negative and if it had any relation to the original color grading. But using the GOUT as a starting point gives us the color grading as it was in the theaters from scene to scene. I’m not saying the colors are spot on, but they preserve the variation of the original theatrical color grading. Team Negative 1’s Silver Screen is from various sources and has been color corrected in various ways, so I don’t consider it to be definitive either.

I find the color grading you are using for these Tatooine scenes to be far too yellow and over compensating for the magenta in the blu-ray. R2 looks green instead of blue. And frankly, in the hot desert sun of Tunesia, I believe everyone was looking a bit redder than usual so trying to achieve that perfect skin tone in these scenes doesn’t get you the original look. The images I posted are a 50/50 mix of the blu-ray and your color correction and they match my correction to the GOUT and the Blu-ray. I think the Tarkin scene is overdone leading to magenta blotches on his skin which do not look good and do not match anything I have seen before.

Your tool is doing an excellent job of matching your sources, but it is your sources that I question. Like your source for the throne room seems spot on, but the desert one is far too yellow (that pic you posted of Lucas on set).

Post
#915131
Topic
Neverar's A New Hope Technicolor Recreation <strong>(Final Version Released!)</strong>
Time

I believe that the features officers in ANH have the same color uniform as those in TESB and ROTJ. There are other uniforms as well, tan, white, black, but the top people all seem to have the same greenish uniform. When I color correct ANH for other things, Tarkin’s uniform takes on a similar color to the Admirals from TESB. And the difference in uniforms in that pic above is only lighting. Those are the same color uniforms for the old and new Admirals.

Post
#915126
Topic
Star Wars Trilogy SE bluray color regrade (a WIP)
Time

I really like how distinct it is from the Blu-ray it is. However, I think you have taken some of the shots too far. I know you are using reference shots but I think the reference shot have their own issues. I’m sticking with the GOUT and the LD’s as the closest we have to the original palet (telecined from Lucasfilm’s pristine print) and I found that if I layer the blu-ray and your color correction that it lands right where I think the colors should be. At least for the Tatooine scenes. I can’t see much wrong with the throne room shot.

ANH BR CC
ANH BR CC

And these are spot on for where I am right now trying to color correct them. I have by BR ANH color correction very close so I’m trying to bring the GOUT in line (which requires subtle tweaking) and then I am going to work on some of the troublesome scenes that I think Lucasfilm tinkered with in the HD master. I’m not after a 100% match, just close. These images are pretty on target for where I think these scenes should be.

Post
#914196
Topic
Practical Image Resolution of Film
Time

Well, I think it best to ignore the entire projection system an focus on the film. There are too many variables that can reduce detail. Just considering the film itself, I thnk, will give a more certain answer.

I have access to very little, but what I do have is Star Wars EPS 4, 5, 6, and 1. I know Team Negative 1 had access to several prints so I’m not sure it is accurate to refer to their two offerings as single prints. I can see differing resolutions in A New Hope so it may be that they had to use some from a lower quality copy. But generally those are effects shots. The test is pretty consistent between grain and detail between ANH and TESB, and even Harmy’s ROTJ. I have not done an exhaustive comparison, just some basic ones on frames I have from multiple sources. That led to my above conclusions, but I’m hoping others have looked into it more.

While grain is fine in the final product, with each generation grain as well as the optics of the duplication process degrade the fine details. I’ve noticed that grain can hide some of the data loss in the projects on here. If you add grain to the GOUT it looks higher quality. That’s one of the things Harmy did on the Despecialuzed Edition.

Post
#913782
Topic
Practical Image Resolution of Film
Time

There have been a lot of images of film scans shared and from them I am trying to determine what the practical resolution (as in how much fine image detail there is) exists at each stage. There is the original camera negative (for the Star Wars movies shot on film, that would be 35 mm for most shots and the Vista Vision cameras for the effects shots), then the Interpositive, the Internegative, and the distribution prints. Plus the 3 color separation master and the Technicolor prints. The bluray master was scanned from the original assembled negative. The 2006 GOUT seems to have been from an original Interpositive. The JSC seems to be from something further down and the TN1 Silver Screen edition is from 35 mm distribution prints. Mike Verta is working from a 4k scan of a Technicolor print.

From what I’ve been able to gather from the images that have been shared, the Technicolor prints seem to have less detail than the bluray and are closer to 720p. The 35 mm scans go down further. After all, they are a copy of a copy of a copy of the original so the grain has been amplified and the details muddled. It is the nature of analog copies. Even so, I come up with a resolution of 540p (half HD), so you get more detail than any DVD.

Now I know that film preserves a lot of other information, such as grain, but things like hair and detail lines are what I am looking at. I’m curious if anyone has done a more accurate examination.

Post
#913776
Topic
Team Negative1 - Star Wars 1977 - 35mm Eastman Vs Technicolot Theatrical Version (* unfinished project *)
Time

I love what Mike is doing, but I don’t consider a lot of it to be restoration. I’d almost call it Mike’s cleaned up edition. The tech prints don’t have much grain to speak of because the technicolor printing process doesn’t introduce any grain. So he hasn’t removed any grain from the image. But he is cleaning up things that go back to before the master negative. He’s found the same dirt on the Tatooine scenes as Lowry did. He has not removed the filtering effects that Lucas had Lowry clean up. So his work is closer to the original than the end product that Lowry delivered, but it is not a faithful restoration of the theatrical version. A lot of the things he has cleaned up should be left intact. I would like a collection of versions and one of them is the pure tech print - green tone and all, just cleaned up to look like a pristine print. I am disappointed that the TN1 work has stopped, but word is it will restart from a fresh scan of a tech print, so there is hope that the version I want might yet appear.

Post
#913517
Topic
Star Wars Trilogy SE bluray color regrade (a WIP)
Time

What I’ve found as I’ve worked on my own color regrade is that the shots of Ben when he first meets Luke are desaturated compared to the surrounding shots. That changes the moment they go to get C-3PO. It is the only spot I’ve found to be undersaturated when I compare it to the GOUT DVD and other sources. I don’t like the JSC because the colors seem more off than the Technicolor. C-3PO is positively orange in the first shot and from all the source material I have, he is supposed to be brassy gold (like you have him). The GOUT DVD is both higher resolution and has better colors (once you correct the brightness).

Post
#911686
Topic
Team Negative1
Time

Ah, lots to think about. It is really hard to judge in these matters. It is my experience that you have to trust the site moderators to make wise decisions. I’d had to be privy to a great deal of information on both sides of this to have any idea if justice has been served, but I put my trust in Jay to make the right decisions and to weight the facts as he sees them.

A couple of side points to some comments in the preceding 11 pages:

The holy grail for A New Hope is not the original negative, but the 3 color separation master. I understand it had aged badly in that it had suffered some warping. In this day and age that is nothing significant, but back in 1997, that was a serious issue. These days they can do a digital restoration of a even warped 3 color separation and produce a flawless digital copy. It has been done so many times that I won’t bore you with examples you can pickup on blu-ray.

Who owns a film print? Well, legally the studio probably does. However, in the practical world of collecting, a studio’s right don’t even enter the picture. Possession dictates ownership and nothing else. Who owns a scan of such a print can be dicey. Is it the owner of the print, the owner of the print at the time of the scan, or the person who paid for the scan and is in possession of the scan? Opinions will differ and if someone feels ownership of all scans of a print they own it is really hard to argue with that. I agree that the best course is for a new scan to be made where the owner of the print knows who has the scan and what the intended use is.

What saddens me is that this has happened before the TESB scan was released. But as of right now, a scan of the full Original Trilogy is in the wild, so I am partially satisfied.

Post
#908695
Topic
Help Wanted: Need someone to clean up the Tosche Station deleted scene
Time

All the deleted scenes are on my radar to clean up and color correct. I was going to use the GOUT DVD as the source to match, but now I may use the T-1 SS version (with missing frames replaced from BR and synced to the GOUT). And frankly, this type of thing is a pacing be damned sort of version. The entire purpose is to see the scenes in context. I have a rough cut done and it turns out pretty good. I’m also going to turn to Deleted Magic to cut some other scenes to make this more like an early cut of the film (one that didn’t exist because this will have finished effects and music). But first up is my BR/SE/GOUT restoration project so it may be a while before I get to it.

Post
#903123
Topic
Info: In search of the correct colors for ANH...
Time

I checked my current settings against the last screen caps I posted and it is hard to tell the difference. A general less green tint and the dark areas are no longer as oversaturated. I have rendered it three times without changing the settings in any way. I have, however, been tweaking the various scenes, comparing them to the 97 SE and 2006 Gout (The SE colors are very different, but it helps with saturation, contrast, etc). So far I have not changed my basic color correction settings on any of the scenes… though I am considering using the previous version for the burning homestead.

The conclusion I have come to is that a bunch of amateur monkeys must have gotten their hands on this. I have learned Lowry didn’t do any color correction, just dirt removal. That leave George and the people at Lucasfilm. They should be embarrassed by the horrible transfer. And there was simply no need to make some of the changes in saturation and contrast that I have found. The only way to explain the horrible state is that they did not use the original color timings when they scanned it and then tried to fix them afterward. I’ve color corrected TESB and ROTJ and they need almost nothing in comparison… just a bit of de-reding. I think I’m going to post a video next. I’m going to use ANH and ROTJ and compare the reused shots. Both before color correction and after. And maybe with the Gout as well or the 97 SE. I’ll have to see what I’m in the mood for.

Post
#902400
Topic
Info: In search of the correct colors for ANH...
Time

I am close to having all three OT films color corrected. I completely redid ANH and have done two tweaking passes. I am comparing it to both the 2006 GOUT and the G’Kar/TB merged version I did for myself. I am working with multiple tracks to do more than just a master color correction. But it is contingent on having a good color correction to start with because everything goes from there. I decided that the first priority was to de-magenta what I could. I was not able to return to the colors of the original, but they are close. The different color channels are clipped differently and the film was scanned in some strange way that really ruins it in so many ways. Most of the film can use the base color correction, but some of the C-3PO/R2-D2 shots that start the film have been fiddled with. Most of the film is consistent between the 2006 GOUT, the 97 SE broadcasts, and the BR. But a great many of the scenes have been done differently. I suspect that they took a shortcut and did not follow the full color grading when they scanned the negative. Why I can’t imagine, but with a very consistent pattern of shots from one angle always matching each other but not necessarily matching the rest of the scene, it seems like something was done wrong.

I have only identified two shots in the middle of the movie, but many during the lightsaber duel and the Death Star battle and a huge number from the first part of the film. And, of course, I can’t help but replace the shots of R2-D2 and the damned rock. But it is on a different track that I can turn off or on as needed. I think I am close, but every other time I have thought that I have had to go back and try again. But this time I have conquered more issues than ever before, so I have hopes this is the one. The last one I posted was so close… just not close enough. I’m rendering it right now to view and determine what else I need to do. If I’m satisfied, the next step is to compare the OT to be sure they are tuned to the same color palet. My early test shows they are close. In particular the reused shots of firing the Death Star weapon in ANH and ROTJ and the Death Star corridor shots.

I’m making one editorial change. I’m taking the intro from TESB and using it on ANH and ROTJ. That updates the music for ANH (again, a change I can use or not use at will) and the pacing for ROTJ. I’m going to use it for the prequels when I get back to them. I’m also going to change the fade-out between the droid auction and the repair shop to match the 2006 GOUT, the 97 SE G’Kar, and the DVD. It’s only a few frames that were trimmed out, but it creates a needless difference between the versions. But that will be the last thing I do because I want to keep the track intact until I am truly finished.

Post
#901875
Topic
Team Negative1 - Return of the Jedi 1983 - 35mm Theatrical Version (unfinished project)
Time

If I was editing at work, I would insist on 2 monitors so I could have a dedicated display. That is about the only reason I would want a second monitor. I tend to dislike them a lot.

I think each film has certain drawbacks no matter what version. There are things that piss me off with just about every one. I really like that they got Ian to redo the emperor, but I don’t think the new lines add anything. But the originals (which should be the focus of this topic) have their issues as well. Continuity was not one of Lucas’s specialties and the SE’s just prove that he doesn’t pay much attention to those things because so many of the changes disrupt continuity and most of the original mistakes were never fixed. I thought the original Jedi was the best version. It really didn’t need any of the SE additions. My ideal trilogy would be a semi-specialized of ANH, The TESB SE, and the original ROTJ, so I am very excited for this version of Jedi to be released. Love the samples so far.

Post
#899290
Topic
Info: In search of the correct colors for ANH...
Time

Well, I did see it as completed. I had no plans of issuing a file, just supplying the settings I used so you could do your own render. But after revisiting TESB and ROTJ and finding some tweaks there, I think I must revisit this. Plus with the excellent -1 version now available, I have a new source to compare to and that could change some things. That gives me the GOUT (DNR’d to hell but good colors), the JSC (missing many frames, but a distinct transfer), the 97 SE broadcast (also DNR’d to hell, but also good colors), the DVD/BR (with so few changes and adjustments, they are practically the same plus they are from the same transfer), and now the Team Negative 1 35mm scan. One thing that I am trying to also do is to identify non-optical “corrections” to the film that were done to the DVD/BR transfer so I can undo them. If it weren’t for such things, it would be easy to create settings to re-render the entire move. As it is, some scenes are just crap because they “improved” them. The early scenes with C-3PO are particularly nasty. The purpose of this topic is the basic settings on top of which those “improvements” and “corrections” can be undone.

Post
#899275
Topic
The Force Awakens : Fan Edit Ideas
Time

Okay… to many posts for me to read right now so I’m just going to post my list.

  1. use the standard light saber sound
  2. explain the republic better and just what gets destroyed and why the people at Maz’s place can see it. This might be done by changing the opening crawl.
  3. hyperspace is used as an instant vehicle rather than one that takes time.
  4. Luke needs a line at the end of the film. Something like, “Hello, Rey. I’ve been expecting you.” Or something cool. To hell with it spoiling the next films.
  5. I’d need to see the deleted scenes and the next movie before I can know what else for sure.

From my point of view, this movie needs more work than any of the other 6 to bring it to where it could be. It has more potential than the prequels, but the final product isn’t as well made. We get awesome characters. Some of the best in any of the films. But we don’t get a good story for them. I loved the death and the potential that it leaves. But there is a lot lacking. In each of the other 6 films, the story came to a close. This one did not.

Post
#881836
Topic
Info: Need special effects for your edit? Request them here!
Time

darth_ender said:

Hard to maintain my silence with an awesome thread like this, but I will simply say two things:

  1. This is awesome that you are doing this. I feel this sort of thing has been needed for some time. So many editors have to reinvent the wheel, and there are skilled FX guys like you who can contribute so much to others’ edits.

  2. My request would be simply that you finish the effects in several of the released deleted scenes. For instance, the scene where Luke speeds past the old lady on the way to Tosche Station, Luke training on Dagobah, Jerjerrod watching the Death Star II turn upon Endor on the viewscreen, etc. Such would be invaluable for sure. Even if the scene itself has scratches all over, it’d be neat to see the finished effects. Admittedly, the ANH scene with the old lady interests me for the sake of Ryan McAvoy’s Lost Workprint edit.

That’s funny, because I’ve been working on finishing that scene. I have a very rough cut, but I don’t currently have it rendered as a separate clip and I goofed on my matting and cropping so I have to redo a lot of it. I haven’t posted any requests here because I am trying to do all the work myself, but I also haven’t fully reviewed all the deleted scenes.

Post
#881423
Topic
Info: In search of the correct colors for ANH...
Time

towne32 said:

My first reaction was: not bad at all. A bit desaturated for in the Tantive for my tastes, but the rest looks pretty good.

But then I read your post. You’re saying this is with a single correction across the entire film? Quite impressive if that’s the case. It’s not an easy thing to accomplish. Do you think brights could maybe be a little bit brighter without losing much in the way of detail?

In some shots, yes, but in others, doing much to the brightness has strange consequences. That is something I’m saving for my shot by shot correction (well, not quite that detailed, but I do plan on having several levels of correction to deal with several issues that crop up more than once). I’m also going to address the light sabers separately. My initial goal is to stay true to the BR and SE edits to get what they should have been, but my ultimate goal is my own edit which I have a separate topic for.

Post
#881422
Topic
Info: In search of the correct colors for ANH...
Time

Now for the Sony Vegas Pro 12 settings that I used.

I started with the demuxed video stream from the blu-ray. All the FX are built in to Sony Vegas Pro.

First, I used a Video output FX Levels to correct the viewing image. I used the Studio RGB to Computer RGB to correct for Vegas’s automatic use of cRGB when most video players use sRGB. Turn this off to render an sRGB compliant file and leave it on for a cRGB file.

I used one Track FX. I used the RGB curves for overall brightness. I raised the midtones and limited the brightness and darkness of the image. This is where I brought out the details in the sky in the Burning Homestead scene. Here is a screen cap of the settings.
RGB Curves FX

Depending on how you want to do this, you could do all the settings as Track FX. I tend to do most as Video Event FX, but it doesn’t matter which way, as long as you do the settings in order. Changing the order will change the results as Vegas applies them in order. The follow are all Video Event FX the way I did it. I’ve only listed the settings I changed.

Brightness and Contrast - Contrast: -0.212

Color Corrector (Secondary) - (for ANH BR, I didn’t change anything here, but if you find the overall saturation too high, this is where you can change it)

Color Balance - Red: -0.031, Green: -0.051, Blue: 0.003

Color Curves - Red:
Video Curve Red

Green:
Video Curve Green

Blue:
Video Curve Blue

Composit:
Video Curves Composite

Unsharp Mask - Amount: 0.150, Radius: 0.100 (I found this setting helps to up the contrast of the image in a completely different way than Brightness Contrast and it works with the reduced contrast of the other setting because it helps bring out the fine details that reducing the contrast overall would tend to hide)

Levels - Input Start: 0.014, Output End: 0.980

For those who don’t use Sony Vegas, I hope this helps if you want to use other software to duplicate my color correction. If you do use Sony Vegas and you want my .veg file, PM me your email address.

I believe that concludes the purpose of this topic. I will be proceeding to finish my full restoration of the blu-ray transfer. I am going to make several parallel corrected tracks (one with further reduced contrast, one dealing with the over saturated shadows, one for the space shots that is darker, one for the dark grays that are blue, and one for the muted explosions) that I will use to correct groups of shots that I think need the same or similar correction, then refine it on a shot by shot basis. I shouldn’t need to use any additional settings.