logo Sign In

Spaced Ranger

This user has been banned.

User Group
Banned Members
Join date
22-Feb-2009
Last activity
13-Feb-2017
Posts
986

Post History

Post
#753197
Topic
Info Wanted: Colorized Classics - is anyone preserving them?
Time

I rung-up the overseas sweatshops and ...

... done!

Seriously though, there was this paper at the 2002 SIGGRAPH entitled
Transferring Color To Greyscale Images; Welsh, Ashikhmin, Mueller
that looks like it was made for colorizing movie dailies long after the fact. It described the research into a semi-automated process of transferring color from a source to a similar, even though B&W, destination.

The technically minded will find the available over-10-years-old .PDF an interesting read. The rest of us can just watch the pretty demo videos. 

Post
#753155
Topic
Info Wanted: Colorized Classics - is anyone preserving them?
Time

SilverWook said:

... the colorized Fleischer Bros. era Popeye's were done in a non digital way as well. They couldn't deal with the intricate "live" three dimensional backgrounds some of the shorts had at all. ... they were real abominations.

Leonardo said:

 Yes, if I do recall correctly, those were sent to Japan and they just retraced and colored some of the animation. That's why they look kinda choppy.

That's one of the things I came across looking for my remembered stencil colorizing technique:

THE STRAIGHT DOPE - Cartoons: Max Fleischer vs Walt Disney
Originally Posted by mobo85:

Originally Posted by CalMeacham:

Much later on, some company redrew the Betty Boops and had them done with colored cels out in the orient somewhere. (the VHS box says "electronically colored", but you can't fool me -- and I heard about it elsewhere).

The Popeye cartoons were redone in the same way as well, as were some black-and-white Looney Tunes. Instead of colorizing the old cartoons, they actually had foreign animators redraw the entire cartoon by hand, thus causing a lot of errors, and also depriving viewers of seeing the patented Fleicher live-action background process. The Looney Tunes were later re-colorized by using a computer to colorize the actual black-and-white original, but the redrawn Popeyes stayed on TV for at least a decade after.


Post
#753075
Topic
Info Wanted: Colorized Classics - is anyone preserving them?
Time

@ SilverWook

I came across an article years back when I was interested in how they did that "colorization" thing on some classic B&W movies. It was research for what I was planning to do in the future of my Master Timeline For World Domination® and didn't want to re-invent that wheel.

Clearly pre-dating computer processing (1960's and onward), I read of a photo-stencil process -- copy the B&W film through mosaics of colored stenciling to color film (an optical-printer/animation-stand set-up). Unfortunately, all I can find now, in a few quick searches, are references to stenciling that applies tinting directly to film -- not the process of which I once read.

If I come across that info again, I'll post it.  BTW, I, too, prefer the computer methodology. 

.

@ larkofam

I'm posting this info across a few entries ... as I do it myself and ready screenshots. Included will be info on Avisynth and a script to do what I'm demonstrating in my paint program -- if I can figure out the corresponding functions and/or find plug-ins to do same.  :)

Avisynth is what I, and many others, use for involved, video & audio manipulation. It outputs a stream of video/audio to a video encoder of your choice to create a movie file. That file, in turn, can be played directly on your computer and/or encoded to disc for a DVD/Blu-ray player. (Most of that is beyond the scope of this posting. See other forum threads for that information.)

BTW, if you have a decent paint program, that's an easy and interactive way to quickly visualize and test the procedures I'm describing.

Post
#753009
Topic
Info Wanted: Colorized Classics - is anyone preserving them?
Time

Oh, sure!
Colorizing movies were originally made by a physical process where a limited-color palette of color overlays were applied to physical areas presenting each frame (or groups of no-motion frames). These limited color-patches were applied throughout the entire film.

So, once a digital process is established, just let it run from beginning to end and that should be the complete project. The corrections I made to the colorized YouTube snapshot therefore should be a representative gin-up of the entire, original colorizing process ... if we were to use those specific  YouTube sources. Better sources shouldn't need fix-ups, unless for better esthetics.

This can be seen in the recent LegendFilms colorization of The Little Rascals on DVD (should be a digital process now-a-days).

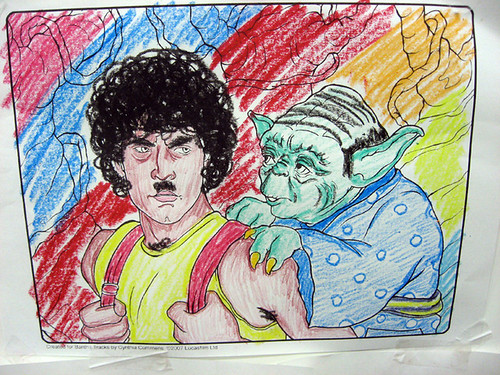
  Notice that the Hues are essentially flat, and uniformly cover wide areas. (Just think rooms full of women workers knife-cutting celluloid sheets of different colors for specific areas of each shot. Yep, that's how it was done!) Saturation is pretty much uniform for all those Hues ... just like in those old days.

In fact, the more ambitious and meticulous restorer could digitally recreate the Hue masks to apply over the B&W original for perfect colorization.

Post
#752937
Topic
Info Wanted: Colorized Classics - is anyone preserving them?
Time

The process starts with the standard definition (SD) colorized source (in this case, a YouTube screenshot) ..

.. and it can be used as-is. But it really needs to be spiffed up. I use a paint program to get the shot where I want it to go. Once there, Avisynth, or another video program, is used to achieve the same result, even if from different processes in that environment.

First, to get that "fog" of muted color fixed up, I use Color Balance to adjust the ambiance of the shot with a luminance temperature slider. This is moved from it's default position of "Sunlight" (6500K) to the "Incandescent bulb" (2500K) direction. 5600K looked like a good enhancement value -- it expanded the apparent depth of colors without color-washing it. Granted, a subtle effect ..

.. but a step in the right direction.

Next, the colors need some strength. Using the Hue/Saturation/Lightness color wheel, shift the Hue of the entire spectrum slightly towards red while bumping up the Saturation a good amount. However, doing that also over emphasizes an odd splash of aqua on the lapels of the left-hand jacket (and nowhere else). That requires Hue shifting the blue spectrum-segment in the opposite direction while dramatically dropping it's Saturation ... to match the rest of the jacket ..

Now it's starting to look good.

The last and most important correction is luminance for better brightness & contrast. The luminance of the colorized SD source must align to the luminance of the B&W high definition (HD) source (assuming the B&W source is at it's best).

NOTE: unless the luminances are thus synchronized, the final result might have noticeably skewed coloring from the different brightness levels. It's not that big a difference when transferring colorizing between B&W sources. However, using this technique to transfer color between different colored sources will suffer if this alignment is not made.

So, the easiest way to do this is to split out the luminance from both sources (using Split Channel - HSL). Then obtain the setting values by adjusting the SD source to match the HD source (using Histogram - Luminance) ..

    SD 360p luminance: start

               HD 720p luminance: target

    SD 360p luminance: finish

After that, discard those temporary luminance pictures (no longer needed) and apply the obtained settings directly to the colorized source ..

The newly spiffed colorized source now is ready for the H-S-L recombination treatment.

Post
#752881
Topic
Info Wanted: Colorized Classics - is anyone preserving them?
Time

The first (and easiest) thing I wanted to do was a paint program test. Taking jerryshadoe's cue, I went with Miracle On 34th Street. From the available DVD and Blu-ray of that movie, the final result should be spectacular.

For me, it was off to YouTube to look for standard-def colorized and high-def B&W sources. Pickings' were pretty slim but I found the needed matching snapshots. The SD 360p colorize was pretty bad -- from weak, wrong-tinted, and color-smeared video tape, with massive YouTube compression. The HD 720p was better but it had the poster's logo-bug on it (I mean, really?).

Regardless of the sources, you should always fix each with a critical eye to make it as pristine as it can become. Then the smaller colorized source would be resized and repositioned to match the B&W source. Black-border the clean picture area of each to prevent weird coloring in garbage-filled edges. And, for the best end result, correct the luminances of one or both sources to match your ideal picture, before splitting/recombining the H-S-L parts.

What to expect? Something like this (shown here half-sized to fit this page):

     YouTube SD @ 360p (needs fix-ups)                                    YouTube HD @ 720p
               for Hue and Saturation                                                      for Luminance


                          HS & L recombination for SD colorization (fixed) at HD resolution

Of course, the caveats for this method:
     * sources with different aspect ratios requiring image crop or fill-in of missing color (note outlines)
     * non-uniform sizes from the masters requiring piecemeal resize-matching

Post
#752770
Topic
Info Wanted: Colorized Classics - is anyone preserving them?
Time

Sorry for the delay in replying, but I just saw that this party is still jumpin'!  :)

.

@ larkofam

Thanks! I use a standard paint program for all my proof-of-concept tests. The process is exactly as described above. Those tests can be replicated, hopefully, in Avisynth (freeware) for video processing. If Avisynth's built-in processes don't handle it, usually a 3rd-party plug-in (also free) will. I've never gone that far with the above Disney's Zorro test ... yet.

.

@ jedi_jra & colorizedfan

BTW, those are excellent lists of colorizations! I'm green with envy! 

.

@ larkofam & jerryshadoe & Space Hunter M

I'll try to work up an Avisynth script on still pictures (which would work the same as on video streams).

.

@ TV's Frink

  I know, I know ... I have the same problem with SilverWook's TV alert!

.

@ SilverWook

Thanks for the broadcast heads-up! Unfortunately ... I don't get it (literally).

I thought Disney had put this "back into the vault" years ago. I hope someone's saving it all ...

"We're only gonna get one chance, Derebridge. That thing won't be back for another 76 years, and we'll both be dead. We have to take a look now."

-Lifeforce (1985)

Post
#751877
Topic
The Hobbit Rankin/Bass Animated Film..... (Released)
Time

It's definitely easy to do digitally. My "proof of concept" examples are completed in an ordinary paint program. It has Split Channel and Combine Channel functions to do that part of the work. The free Avisynth, and it's variety of function plug-ins, is the popular work environment that does on video what a paint program can do on stills.

As The Hobbit was a NTSC production, I wouldn't expect any improved quality from PAL sources. PAL releases are (almost?) always mash-ups of the original-NTSC releases, which probably would produce lesser quality.

Post
#751769
Topic
The Hobbit Rankin/Bass Animated Film..... (Released)
Time

Of course, using a tape source could never be a full substitute for DVD. But there may be quality differences for the available tape sources - noise, color reproduction, picture area, and audio - that may help.

I only mention that because I tried a quick color correction on your original DVD screen cap (page 1). Neither RGB nor color-wheel adjustments easily yielded results to exactly match your accompanying VHS cap. That might suggest an HSL recombination (Hue & Saturation from a tape source; Lightness from the DVD) to be a better workable process. It would look something like this (the added red border hi-lights the tape-source edge):

Post
#751617
Topic
The Hobbit Rankin/Bass Animated Film..... (Released)
Time

Have you considered the Video8 release (8mm tape) as a slightly better quality tape-alternative to Beta/VHS?

The Hobbit - Video 8 Movie 8mm - J.R.R. Tolkein's Animated Film - BRAND NEW
http://www.ebay.com/itm/The-Hobbit-Video-8-Movie-8mm-J-R-R-Tolkeins-Animated-Film-BRAND-NEW-/400844825836
[note: see on the box -- "Stereo" & "76 minutes"]

Wikipedia - 8 mm video format:

In terms of video quality, Video8, and Beta-II offered similar performance in their standard-play modes. In terms of audio, Video8 generally outperformed its older rivals. ... Video8 later included true stereo ... In general, Video8 comfortably outperformed non-HiFi VHS/Beta.

Post
#749968
Topic
Idea & Info: Cinerama 70mm '2001' preservation. Is it possible?
Time

I, too, couldn't figure how to apply my R-G-B approach to the stewardess shot until I remembered the analogue-to-digital relationship of tint-to-hue when correcting LD-captured color bars. Using hue was the solution. So, too, is your problem ... only reversed. The solution is an R-G-B adjustment.

The Blu-ray shot not only looks green in the moon's surface, but also green and blue of the aqua moon bus. It could be approached as Green & Blue are too strong. Or it could be approached as Red is too weak. In such darker shots, I prefer strengthening the weaker color(s) to raise the overall luminance level ..

Viola! And, yes, this does look like the LD capture ... if that capture is slightly brightened (increased lightness & contrast) ..

Post
#749789
Topic
Edge Enhancement Removal
Time

Sure. These caps were by SilverWook for msycamore's THX 1138 thread. (Unfortunately most of those are gone now due to ImageShack's recent renovation. This selection is from what I saved of that, years ago.) I skipped DeHalo_alpha's default values and went directly to my tweaks. This shot wasn't particularly halo'ed but I moved the magnification to include the cable that was:

I'm rather impressed that DeHalo_alpha handled the halo'ed cable without touching un-halo'ed areas; for example, the eyelashes.

This shot needed script adjustments (different from the 1st, and more severely halo'ed, shot):

[for less dark strength that improperly lightened the cable]
from: v1_fix = v1_fix.DeHalo_alpha( ry=1.0, darkstr=1.5, brightstr=1.5 )
to:     v1_fix = v1_fix.DeHalo_alpha( ry=1.0, darkstr=0.4, brightstr=1.5 )

[for lesser contrast fix -- cross-checked dark & light areas w/ eyedropper]
from: v1_fix = v1_fix.Levels( 24, 1.1, 248, 0, 255, coring=false )
to:     v1_fix = v1_fix.Levels( 8, 1.1, 255, 0, 255, coring=false )

[zoom adjusted for different location -- used multiple crop()'s for ease]

Post
#749740
Topic
Edge Enhancement Removal
Time

I've found that DeHalo_alpha() is non-intuitive. It's best to try the default settings and then test-change individual numbers to see the effect. It also helps to add a magnified view in Avisynth for a better look at what's happening.

The 2 top pictures are the before & after compare using DeHalo defaults. It's not bad but halo-ing still shows. Just use DeHalo_alpha() without any settings for that.

The bottom picture is the after part of my trying a few tweaks for stronger fixing. That one is better and halo-ing doesn't show much at all.
- The "default radius" operations for x (horizontal) and y (vertical) are "2". As halo-ing doesn't much show vertically, set ry=1.0 for minimum (or none?) vertical processing.
- The "default strength" operations on dark and bright halos are "1.0". Set darkstr=1.5 and brightstr=1.5 for my stronger and better result. These seem to work best at the same value. Be sure to make small adjustments or ugly artifacts will appear.

DeHalo_alpha() does tend to flatten the contrast so I also added Levels() to darken the now-not-so-dark areas and brighten the now-not-so-bright areas. Always verify to not crush nor blow-out your luminance.

I had previously worked up this AviSynth script to do just this. As you're still a novice at this, here's my (simplified) script with which to experiment. Just comment/un-comment/change the lines you need to, for your tests.

## THX1138 DeHalo_alpha demonstrator
##=================

## Video path & name
clip = "THX1138 US WS 1991 LD.png"

## Get video / picture
#v1 = DirectShowSource( clip )    # for video
v1 = ImageReader( clip )    # for picture

# video / picture size
x_size = 640
y_size = 286

# original & fixed streams for processing
v1_fix = v1


##----------
## DeHalo_alpha()
## clip clp, float "rx", float "ry", float "darkstr", float "brightstr",
## float "lowsens", float "highsens", float "ss"
#
### rx, ry [float, 1.0 ... 2.0 ... ~3.0] Default 2.0
# As usual, the radii for halo removal.
# this function is rather sensitive to the radius settings. Set it as low
# as possible! If radius is set too high, it will start missing small spots.
### darkstr, brightstr [float, 0.0 ... 1.0] Default 1.0, 1.0 allowed
# The strength factors for processing dark and bright halos. Default 1.0 both
# for symmetrical processing. On Comic/Anime, darkstr=0.4~0.8 sometimes might
# be better ... sometimes. In General, the function seems to preserve dark
# lines rather good.
### lowsens, highsens [int, 0 ... 50 ... 100] Default 50
# Sensitivity settings, not that easy to describe them exactly ... in a sense,
# they define a window between how weak an achieved effect has to be to get
# fully accepted, and how strong an achieved effect has to be to get fully
# discarded.
### ss [float, 1.0 ... 1.5 ...] Default 1.5
# Supersampling factor, to avoid creation of aliasing.
##----------

# DeHalo (calls the function script at bottom)
v1_fix = v1_fix.ConvertToYV12()        # DeHalo uses this format
#v1_fix = v1_fix.DeHalo_alpha( rx=2.0, ry=2.0, darkstr=1.0, brightstr=1.0 ) # defaults
v1_fix = v1_fix.DeHalo_alpha( ry=1.0, darkstr=1.5, brightstr=1.5 )    # tweaks
v1_fix = v1_fix.ConvertToRGB24()    # return to default format

v1_fix = v1_fix.Levels( 24, 1.1, 248, 0, 255, coring=false )    # fix lost contrast


## display results

#  add 4x magnify panel to original
v1_mag = v1
    \.PointResize( x_size*4, y_size*4 )
    \.Crop( x_size*10/5, y_size*10/6, x_size, y_size )
    \.Crop( x_size/3, 0, x_size/2, y_size )
v1 = StackHorizontal( v1, v1_mag )

# add 4x magnify panel to fix
v1_fix_mag = v1_fix
    \.PointResize( x_size*4, y_size*4 )
    \.Crop( x_size*10/5, y_size*10/6, x_size, y_size )
    \.Crop( x_size/3, 0, x_size/2, y_size )
v1_fix = StackHorizontal( v1_fix, v1_fix_mag )

# display before & after split screen
StackVertical( v1, v1_fix )


##==========
## Functions 
##----------
 

##==========
## De-halo

# Here are the parameters:

# - rx, ry [float, 1.0 ... 2.0 ... ~3.0] Default 2.0
# As usual, the radii for halo removal.
# Note: this function is rather sensitive to the radius settings. Set it as low
# as possible! If radius is set too high, it will start missing small spots.

# - darkkstr, brightstr [float, 0.0 ... 1.0] Default 1.0, 1.0 allowed
# The strength factors for processing dark and bright halos. Default 1.0 both
# for symmetrical processing. On Comic/Anime, darkstr=0.4~0.8 sometimes might
# be better ... sometimes. In General, the function seems to preserve dark
# lines rather good.

# - lowsens, highsens [int, 0 ... 50 ... 100] Default 50
# Sensitivity settings, not that easy to describe them exactly ... in a sense,
# they define a window between how weak an achieved effect has to be to get
# fully accepted, and how strong an achieved effect has to be to get fully
# discarded.

# - ss [float, 1.0 ... 1.5 ...] Default 1.5
# Supersampling factor, to avoid creation of aliasing.

function DeHalo_alpha(clip clp, float "rx", float "ry", float "darkstr", float "brightstr", float "lowsens", float "highsens", float "ss")
{
rx        = default( rx,        2.0 )
ry        = default( ry,        2.0 )
darkstr   = default( darkstr,   1.0 )
brightstr = default( brightstr, 1.0 )
lowsens   = default( lowsens,    50 )
highsens  = default( highsens,   50 )
ss        = default( ss,        1.5 )

LOS = string(lowsens)
HIS = string(highsens/100.0)
DRK = string(darkstr)
BRT = string(brightstr)
ox  = clp.width()
oy  = clp.height()
uv  = 1
uv2 = (uv==3) ? 3 : 2

halos  = clp.bicubicresize(m4(ox/rx),m4(oy/ry)).bicubicresize(ox,oy,1,0)
are    = yv12lutxy(clp.expand(U=uv,V=uv),clp.inpand(U=uv,V=uv),"x y -","x y -","x y -",U=uv,V=uv)
ugly   = yv12lutxy(halos.expand(U=uv,V=uv),halos.inpand(U=uv,V=uv),"x y -","x y -","x y -",U=uv,V=uv)
so     = yv12lutxy( ugly, are, "y x - y 0.001 + / 255 * "+LOS+" - y 256 + 512 / "+HIS+" + *" )
lets   = maskedmerge(halos,clp,so,U=uv,V=uv)
remove = (ss==1.0) ? clp.repair(lets,1,0)
          \        : clp.lanczosresize(m4(ox*ss),m4(oy*ss))
          \             .logic(lets.expand(U=uv,V=uv).bicubicresize(m4(ox*ss),m4(oy*ss)),"min",U=uv2,V=uv2)
          \             .logic(lets.inpand(U=uv,V=uv).bicubicresize(m4(ox*ss),m4(oy*ss)),"max",U=uv2,V=uv2)
          \             .lanczosresize(ox,oy)
them   = yv12lutxy(clp,remove,"x y < x x y - "+DRK+" * - x x y - "+BRT+" * - ?",U=2,V=2)

return( them )
}

function m4(float x) {return(x<16?16:int(round(x/4.0)*4))}
##==========


Post
#749558
Topic
Idea &amp; Info: Cinerama 70mm '2001' preservation. Is it possible?
Time

@ captainsolo

Good LD info! Now I know for what to watch-out. Thanks!
Some day some one must do an exhaustive history (with comparative pictures, of course) of all the releases -- like a Star Wars website I once came across, with all it's releases list (cover pictures too), domestic and international.
Ah, some day ...  :)

.

@ PDB

I was prompted by skoal's request to back-check your quick tests. It looks like you've already tried a "chairs" adjustment there ... Post 94

But, while there, I again noticed something that previously had caught my eye. It was the type of color difference in the space stewardess zero-gravity walk shot. The laserdisc and Blu-ray comparison showed only the wall-padding differently colored. Using R-G-B adjustments (my manipulation of choice) could not fix it without altering other areas. Then I wondered if they may have used a hue shift for just that part of the color spectrum. Starting with a simplified approach, I tried shifting the entire spectrum ... and that did it! And it seems that's what you must've done for your correction back to laserdisc colors, at least for that particular shot.

Oh, the heresy of this Blu-ray! That's them just pushing the tint button on the monitor to make a mis-adjusted release, saying, "Ah, that's better."

Post
#748980
Topic
Idea &amp; Info: Cinerama 70mm '2001' preservation. Is it possible?
Time

Yes, a "preservation" of the laserdisc should be as we are seeing it thus far. The proviso being an accurate capture (color bars would help there) and no evidence of a malformed production (unlikely -- with the later CLV's reframing having the same coloring).

On the other hand, a "restoration" of the movie, from the Blu-ray using the laserdisc as a color guide, allows more latitude. That is what PDB is doing.

The Criterion Collection laserdisc is head & shoulders above all the other releases in color accuracy. But I'm still holding out hope that this release comes closer still to the Taschen book's photo record (see page 3 for that sample). In fact, if I take the Taschen photo and apply the reverse of my LD-to-Taschen brightness (& contrast & saturation) increases (end of page 3), I get the LD coloring ..

  Taschen photo top    brightness reduction bottom

So, the Taschen representation seems to me to be perfect on-the-set accuracy (just because my eyes tell me so).

Post
#748503
Topic
Edge Enhancement Removal
Time

There really isn't a good solution for this kind of problem. I guess it's not a big enough problem for talented AviSynth'ers to apply themselves to a good fix. You would use a chain of diverse functions (denoising, sharpening, etc.), each applied to fix the other fix's artifacts.

You might like to look at http://originaltrilogy.com/forum/topic.cfm/THX-1138-Japanese-letterboxed-LD-preservation/topic/17360/ for links & tests of DeHalo_alpha() [an update to Blinddehalo3() by the same author] and LGhost().

Post
#748460
Topic
Idea &amp; Info: Cinerama 70mm '2001' preservation. Is it possible?
Time

Yes ... and thanks for that reminder! I must've been so traumatized by the mention of ... * laser rot ... that I completely glazed-over a possible framing correction in the Pioneer re-issued CAV [any news, captainsolo?]. At least the Warner 2007 Blu-ray got that part right (the more picture area, the happier we are!) ..


:)

BTW, I think color bars are master dependent, not pressing dependent (and the 2 versions look like the same master coloring). So, if anyone does a CAV capture, you should be able to use their color bars and a colorful shot(s), matching yours, to globally re-calibrate your capture.

Post
#748420
Topic
Idea &amp; Info: Cinerama 70mm '2001' preservation. Is it possible?
Time

@ skoal

Well, the whole "green" thing is just today's trend of children scribbling with the crayons upon our movies. They do it because the box of crayons (digital processing) has been put in front of them. To get up to speed with that, check out ..

Orange and Teal, or How “Re-Mastering” is Distorting Our View of Classic Films
http://notonbluray.com/blog/orange-and-teal/

Teal and Orange - Hollywood, Please Stop the Madness
http://theabyssgazes.blogspot.com/2010/03/teal-and-orange-hollywood-please-stop.html

The "pink", on the other hand, looks to be something endemic to film (as per PDB). In this particular case (2001:ASO), I believe it is something that shows when proper brightness is lost in the process, whereby underlying variations become more prominent (see my comment & demonstration -- end of page 3). This may be apart from the Criterion LD presentation. The color bars, if we can get them, may tell.

.

@ PDB

Do your sample strips show the full picture area of your captures? If so, there's another curve-ball that's been pitched at us ... aspect ratio! Here is the result of overlapping the 2 captures (from CAV and CLV) of this same shot ..

That would make LDDb wrong in their description of both Criterion LDs having the same 2.20:1 aspect ratio.

CAV:
2001: A Space Odyssey: Special Edition #60 (1968) (Uncut) [CC1160L]
http://www.lddb.com/laserdisc/00997/CC1160L/2001:-A-Space-Odyssey:-Special-Edition-%281968%29

CLV:
2001: A Space Odyssey #60A (1968) [CC1235L]
http://www.lddb.com/laserdisc/03062/CC1235L/2001:-A-Space-Odyssey-%281968%29

Post
#748009
Topic
Idea &amp; Info: Cinerama 70mm '2001' preservation. Is it possible?
Time

skoal said:

Is there a consensus that there is "green" in the BR?

It's not so much needing a consensus as it is using Kubrick's own participation in the remastering process for this Criterion Collection laserdisc (see the OP). DVDBeaver's comparative look demonstrates that the color of the various releases are all over the map and something like a Kubrick-approved remaster is what's needed -- also reflected in PDB's comparative screenshots on page 4.

BTW, that was a good link but captainsolo beat you to it (also page 4).

.

I move that we require 2001: A Space Odyssey to be viewed by sitting in chair from Stanley Kubrick's 1960's futuristic film of the past (2001). So better start saving up (only £750.00) ..

"Authentic Oliver Mourgue Djinn Sofa Airborne International 2001 space odyssey"
http://www.ebay.co.uk/itm/Authentic-Oliver-Mourgue-Djinn-Sofa-Airborne-International-2001-space-odyssey-/301467811337

The funny thing is ... this was contemporary furniture available at the time the movie was made and actually purchased for use in same. I hope that doesn't blow anyone's mind ...  :)

Post
#747747
Topic
THX 1138 - Japanese letterboxed LD preservation (Released)
Time

This plug-in is more like an equation, where one plays with numbers, and less like an intuitive user interface doing specific adjustments. I played with the values some and was able to reduce the faint ringing. The stronger ringing apparently is considered as picture and nothing much happens there. But some improvement is better than none ... except that there is a slight softening effect. (This plug-in is in "alpha" and has been that way for years.)

Here is a before (left) & after (right). Zoom-in to examine the result of ..
DeHalo_alpha( rx=3, ry=1, darkstr=0.4, lowsens=25, highsens=75 )
** note: ry=1 performs no work on the y-axis (vertical) **

Post
#747470
Topic
Idea &amp; Info: Cinerama 70mm '2001' preservation. Is it possible?
Time

@ captainsolo

Another great link chock full of vital info! There's just no end of the quest to get a good representation of the movie.  :O

.

@ PDB

Maybe pink in the master, but wouldn't that (among other things) be what the restoration team was fixing?

This is what made me wonder ..

Here, the brightness & contrast are identically raised -- on the left by luminance, on the right by synchronized R-G-B. One would expect the results to be identical, but they're not. That's because gamma-weighting of the individual R-G-B components is built into luminance adjustment. This is supposedly to compensate for real-world devices and how they reproduce color for our perception. The direct R-G-B adjustment has no weighting (obviously).

Isn't anything simple? It always gets curiouser and curiouser

Anyway, establishing a good color correlation from the Criterion's color bars (althor1138's capture?) would determine if there's anything to this. That's assuming the CAV and CLV images were identical going on, and coming off, their respective laserdiscs.

.

@ Asaki

All the on-the-set pictures I've seen only show standard incandescent lighting fixtures (whether behind panels or on stands). Also, filming fluorescent lighting produces beat, like filming off a TV screen. FX supervisor Trumbull only later, while working on his Silent Running sci-fi movie, developed combined, counter-phased lighting to work around the fluorescent problem. So I wouldn't think that's the problem.

Further, Kubrick had already established a system of Polaroid instant color photos, cross-referenced to film by director of photography Unsworth, to get exactly the color & lighting he wanted, on film, the first time. I hope he wasn't on a pink-kick.  :)

Post
#747226
Topic
Idea &amp; Info: Cinerama 70mm '2001' preservation. Is it possible?
Time

PDB said:

Strange I could always see the pics. I re-uploaded ld comp 2. They are on S1 now. Let's see if you can see them now.

Yes, now it's showing for me. Thanks! It's flaky and not everyone has trouble with it all the time. (I wonder if it's some sort of international access / blocking for certain servers?)

Really nice screenshots! There's a pinkish hue that shows up when the LD pictures are on the darker side. It minimizes as the brightness goes up to the Taschen-pictures level. I'm wondering if it's something like gamma weighting during laserdisc mastering (something that Kubrick wouldn't see during the approval process?).

Wikipedia - "Luma (video)"
http://en.wikipedia.org/wiki/Luma_(video)

Post
#747220
Topic
THX 1138 - Japanese letterboxed LD preservation (Released)
Time

Thanks for your AviSynth procedure file!

I had looked around for a plug-in to handle "ringing" or, more accurately, "edge-enhancement haloing" (that's sharpening done the wrong way). The only one I could find was DeHalo_alpha() and it required allot of experimenting to get a feel for what it does when it's variables are adjusted. Using it for chromatic aberration correction, I came up with this ..
http://originaltrilogy.com/forum/topic.cfm/THX-1138-preservations-Italian-Cut-available-see-1st-post/post/625888/#TopicPost625888
When applied to haloing caused by edge-enhancement, I made a demonstration (the post just after the above one) on a very obvious example. It wasn't eliminated, but it was reduced. Certainly worth consideration as very little bit helps.

Yeah, the paint program sharpening is obviously poor in some areas. I definitely wasn't suggesting using that.  :D  Here's LimitedSharpen() applied to that same screenshot, before & after ..

.. with this setting -- LimitedSharpen( strength=250, overshoot=0, exborder=4 ).

Post
#746794
Topic
Idea &amp; Info: Cinerama 70mm '2001' preservation. Is it possible?
Time

Too bad about those color bars not being on the CLV, but the caps look great -- those colors coming through will make the Blu-ray color-correction shine! Maybe althor1138 can post his color bars with a couple of full spectrum screenshots to act as a Rosetta Stone? The Criterion laserdisc looks to be consistent throughout (see the following test adjustment). Then you can adjust your captures to match with a single setting.

In that regard, I tried a quick brightness (gamma) & contrast (midtones expand) on ld_comp_1.jpg:

Very nice.  :)

BTW, http://s21.postimg.org/7r80easzb/ld_comp_2.jpg is not coming through for me. ld_comp_1.jpg, ld_comp_3.jpg, and ld_comp_4.jpg show fine. Postimg.com appears to be a little flaky. I've seen this problem before. I wonder if it's their "s21" (server21?). Could you upload ld_comp_2.jpg again?