
- Time
- (Edited)
- Post link
I would love to see the whole movie with everyone having purple skin tones, like Image 3 on post 140. It would be called Star Wars Episode IV: A New Hope Purple Face Edition.

I did see this, don't know about the movie, but it's got that excellent technicolor look to it alright. It makes me sad to see films like Into Darkness and The Desolation of Smaug go with really harsh red and blue gradients instead of allowing the original colors shine through.
You probably don’t recognize me because of the red arm.
Episode 9 Rewrite, The Starlight Project (Released!) and ANH Technicolor Project (Released!)
I would love to see the whole movie with everyone having purple skin tones, like Image 3 on post 140. It would be called Star Wars Episode IV: A New Hope Purple Face Edition.
But surely you know that it was George's original vision to have everyone be purple-skinned aliens, don't you?
You probably don’t recognize me because of the red arm.
Episode 9 Rewrite, The Starlight Project (Released!) and ANH Technicolor Project (Released!)
No, He wanted them to look like lobsters, not like purple aliens, I was saying that if you could create the movie with all those purple faces... It would be crazy and hilarious at the same time to watch...
This project has been in hibernation for a while as I figure out how it should continue, but here's a small update:
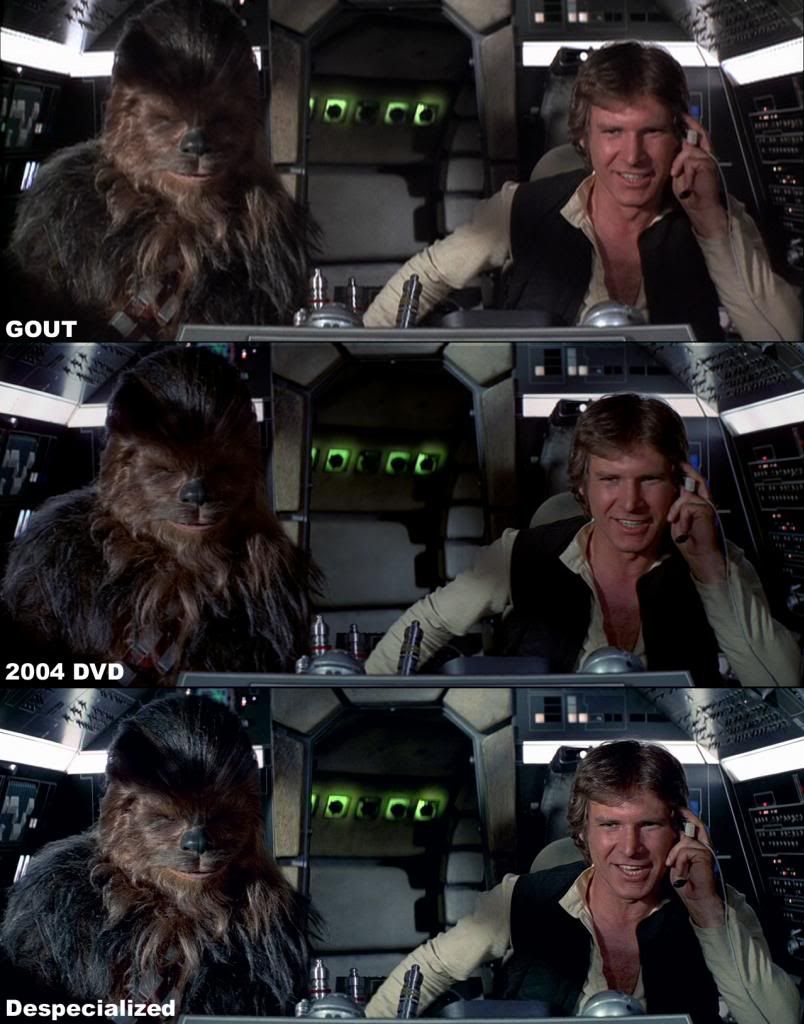
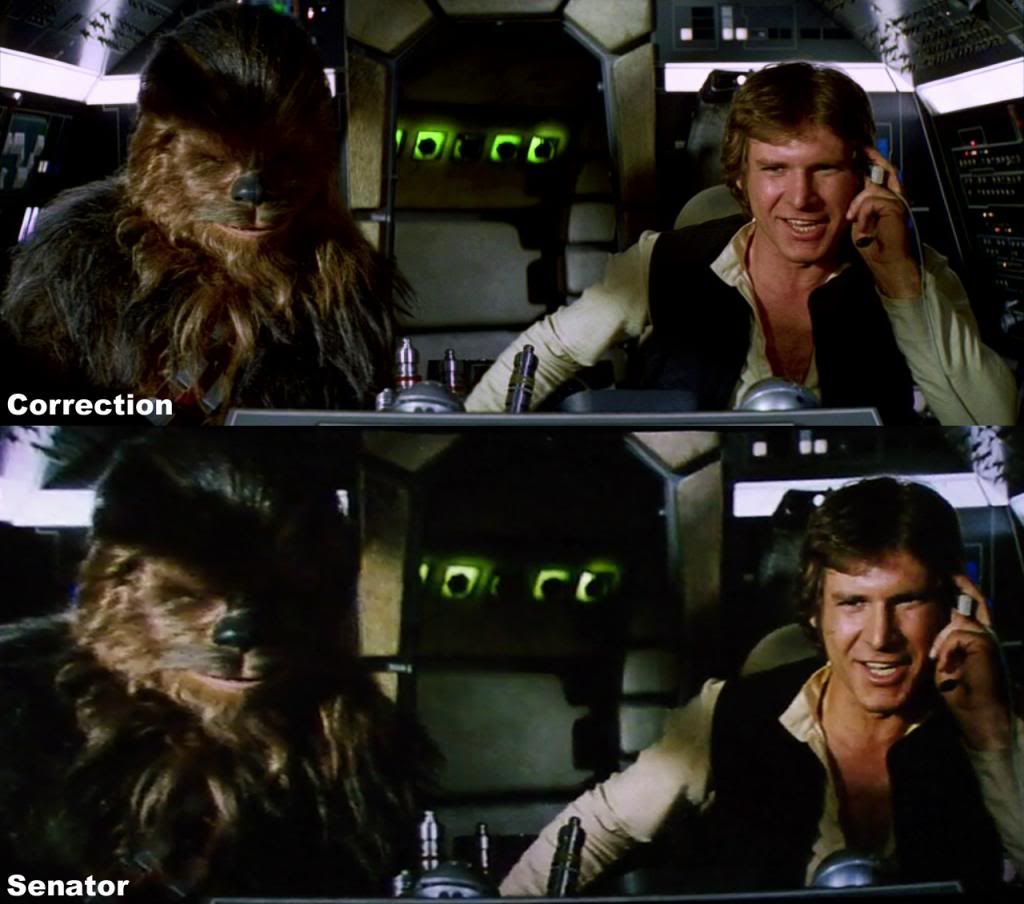
I've done a shot-by-shot correction of the Death Star explosion rather slavishly from the video of the Senator screening:
Password: DS
Apparently the Death Star is quite blue in that shot. I suspect that the desaturation of the explosion for the DVD stems from a decision to make the Death Star a neutral gray, which then carried over to the explosion itself.
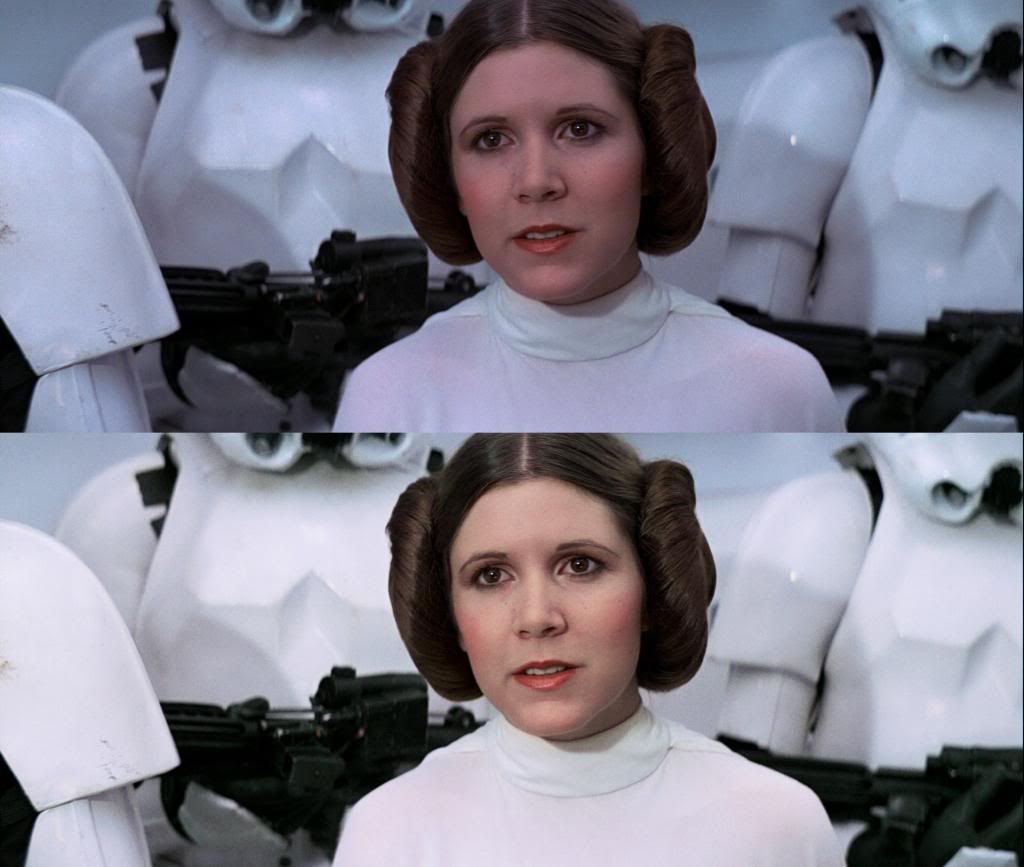
Comparison of the final shot:
Sorry about the lack of updates recently, there's been a lot of school and a lot of education happening.
You probably don’t recognize me because of the red arm.
Episode 9 Rewrite, The Starlight Project (Released!) and ANH Technicolor Project (Released!)

Neverar, you have no need to apologize with work like this! This is easily the best color correction effort I've seen, since I love the look of the Senator projection so much. The warm feeling just looks great on the footage, and is such a great contrast to the cold, red look of the GOUT which I'm so used to.
Keep it up.
I’m just here because I’m driving tonight.
Thanks, I will!
But I think that the time has come to move to a different thread. My goal was to find global settings that fix many of the problems of the film, and these have been found. It's a seven page word document right now, so I can post that here or send it to whoever is interested, just say the word.
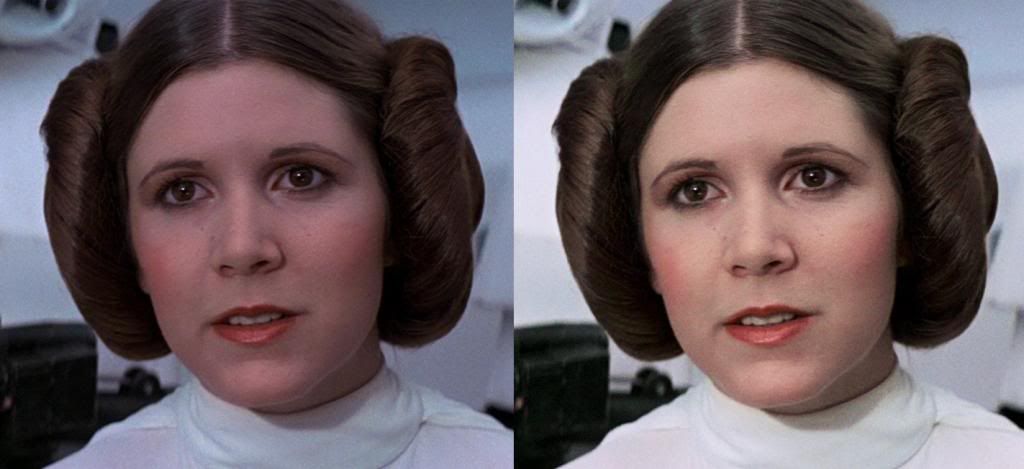
Today saw a big test: applying these settings to the Blu-ray. The source is the 1080p disc, in all its glory. I'll let the results speak for themselves:
Fine detail:
Now the scene-by-scene (and shot by shot) correction can begin. Who knows when it will end?
You probably don’t recognize me because of the red arm.
Episode 9 Rewrite, The Starlight Project (Released!) and ANH Technicolor Project (Released!)
I can't believe how blissfully unaware of the 2004 transfer's problems. I watched that transfer for 4 years!
Seriously though, I'm liking this. It's a way of removing the over-blue without drowning the skin-tones out like Adywan.
I’m just here because I’m driving tonight.

@NeverGreat, Did you wrote a paper about the color issues in the Star Wars 2004 master?!
BTW, Perfect color correction. Impressive.

In your settings on page 3, for the bottom layer, there is one setting missing for the channel mixer settings.
Can you please share this missing setting?
Here are all the settings. Disclaimer: Will not make every shot better. May make some shots worse. Anyone who goes insane attempting to successfully implement these settings has only themselves to blame.
:)
Video Layer 1 (Base Layer)
This layer controls the color and luminosity of the deep shadows.
Applied Effects:
Opacity:
Normal
Image Control:
Brightness 0
Contrast 80
Hue -100
Saturation 85
Channel Mixer:
Red-Red 23
Red-Green -5
Red-Blue 8
Red-Const -3
Green-Red 25
Green-Green 51
Green-Blue -22
Green Const 0
Blue-Red 0
Blue-Green -25
Blue-Blue 27
Blue-Const 0
Adjustments:
Color:
Hue 0
Lightness 0
Saturation -20
Vibrance 0
Gamma:
10
Lighting:
Brightness 40
Contrast 0
Exposure 70
Black 0
White 0
Video Layer 2 (Overlaid on Video Layer 1)
This layer in conjunction with layer 1 controls the color and luminosity of the shadows.
Applied Effects:
Opacity:
Screen
Image Control:
Brightness 0
Contrast 80
Hue 0
Saturation 85
Channel Mixer:
Red-Red 85
Red-Green 10
Red-Blue 10
Red-Const 0
Green-Red 0
Green-Green 75
Green-Blue -20
Green Const 0
Blue-Red -40
Blue-Green -15
Blue-Blue 150
Blue-Const 0
Adjustments:
Color:
Hue 0
Lightness 0
Saturation -20
Vibrance 0
Gamma:
10
Lighting:
Brightness 30
Contrast 0
Exposure 50
Black 0
White 0
Video Layer 3
This layer controls the color and luminosity of the midtones.
Applied Effects:
Opacity:
Screen
Image Control:
Brightness 0
Contrast 80
Hue 0
Saturation 85
Channel Mixer:
Red-Red 56
Red-Green -27
Red-Blue 5
Red-Const 0
Green-Red 5
Green-Green 15
Green-Blue 0
Green Const 0
Blue-Red 9
Blue-Green -44
Blue-Blue 28
Blue-Const 0
Adjustments:
Color:
Hue 0
Lightness 0
Saturation 0
Vibrance 0
Gamma:
15
Lighting:
Brightness -18
Contrast 38
Exposure 90
Black 0
White 0
Video Layer 4
This layer controls the color and luminosity of the highlights.
Applied Effects:
Opacity:
Screen
Image Control:
Brightness 0
Contrast 100
Hue 0
Saturation 100
Channel Mixer:
Red-Red -122
Red-Green -157
Red-Blue -200
Red-Const 0
Green-Red 8
Green-Green 55
Green-Blue 15
Green Const 0
Blue-Red 20
Blue-Green 15
Blue-Blue 60
Blue-Const 0
Adjustments:
Color:
Hue 0
Lightness 0
Saturation 0
Vibrance -4
Gamma:
28
Lighting:
Brightness 59
Contrast -84
Exposure 100
Black 0
White 0
Video Layer 5
This layer limits the oversaturation of blue and red, and green to a lesser extent.
Applied Effects:
Opacity:
Subtract
Image Control:
Brightness -100
Contrast 100
Hue 0
Saturation 100
Channel Mixer:
Red-Red 22 (This setting controls the amount of red bleed such as in red lights.)
Red-Green 200
Red-Blue 33
Red-Const 0
Green-Red -50
Green-Green 33
Green-Blue 30
Green Const 0
Blue-Red 20
Blue-Green 0
Blue-Blue 135 (This setting controls the amount of blue bleed, for example around the Death Star Explosion. Increasing this number decreases the blue bleed.)
Blue-Const 0
Adjustments:
Color:
Hue 0
Lightness 0
Saturation 0
Vibrance 0
Gamma:
6
Lighting:
Brightness 0
Contrast 0
Exposure 0
Black 0
White 0
Video Layer 6
This layer tweaks the color and luminosity of the highlights.
Applied Effects:
Opacity:
Screen
Image Control:
Brightness 0
Contrast 110
Hue 0
Saturation 100
Channel Mixer:
Red-Red -200
Red-Green -200
Red-Blue -200
Red-Const -200
Green-Red -200
Green-Green -200
Green-Blue -200
Green Const -200
Blue-Red -150
Blue-Green 0
Blue-Blue 200
Blue-Const -15
Adjustments:
Color:
Hue 0
Lightness 0
Saturation 0
Vibrance 0
Gamma:
17
Lighting:
Brightness -100
Contrast 100
Exposure -100
Black 0
White 0
Video Layer 7
This layer regulates the highlight layers below it, fixing color casts by removing colors.
Applied Effects:
Opacity:
Subtract
Image Control:
Brightness 0
Contrast 100
Hue 0
Saturation 100
Channel Mixer:
Red-Red 0
Red-Green 0
Red-Blue -100
Red-Const 0
Green-Red 5
Green-Green 25
Green-Blue -60
Green Const 0
Blue-Red 40
Blue-Green 80
Blue-Blue -200
Blue-Const 0
Adjustments:
Color:
Hue 0
Lightness 0
Saturation 0
Vibrance 0
Gamma:
10
Lighting:
Brightness 0
Contrast 0
Exposure 0
Black 0
White 0
Video Layer 8 (Original video used as a comparison)
You probably don’t recognize me because of the red arm.
Episode 9 Rewrite, The Starlight Project (Released!) and ANH Technicolor Project (Released!)
I have applied these settings in Premiere Elements (and triple checked them) but the picture is looking very green.
Any ideas? (Please ignore the text, I am currently using a trial version)
Nevermind I figured out the issue. :)