
- Time
- Post link
Those magenta tones drive me crazy. They are on a lot of the Lowry restored Bond films as well.

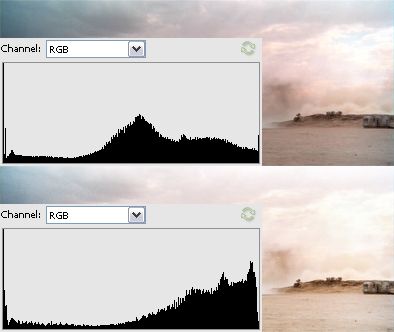
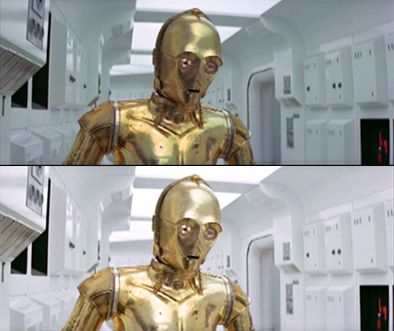
In trying to bring more brightness to the movie, this latest stab has three layers of video, two with the "screen" option enabled. This means that I can technically have a channel mixer on each one, and alter the highlight color and luminosity separately from the midtones and shadows. With so many settings at once it's kind of overwhelming, so I essentially left the colors the same, but I managed to pull the brightness of the movie up again without crushing the whites. Some shots are right at the far edge of the histogram, which is what we want:
Compare this to the GOUT, and this version may be even brighter:
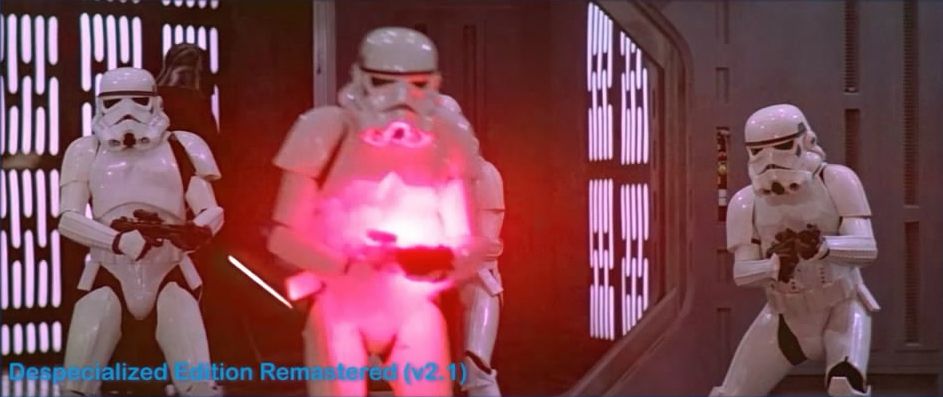
In my humble opinion, I think the same shot in Harmy's Despecialized 2.1 could stand to use these settings, as it suffers from the magenta tones of the DVD/Blu-ray:
You probably don’t recognize me because of the red arm.
Episode 9 Rewrite, The Starlight Project (Released!) and ANH Technicolor Project (Released!)
Those magenta tones drive me crazy. They are on a lot of the Lowry restored Bond films as well.
I have a bit of a problem right now, hopefully someone can help...
In attempting to fix the blown out highlights in the Burning Homestead scene, I used Photoshop Elements to experiment with the histograms. By using the "darken highlights" tool in the highlights/shadows toolbox, I was able to obtain a very promising result with both underexposed and overexposed parts of the film.
Here's the problem. The shadows/highlights tool in Premiere Elements 11 doesn't work for me, because it seems to be unable to darken highlights. Does anyone know of a plugin for Premiere that will do this, or some sort of workaround?
JEDIT: Nevermind, it seems to work, and the results are quite good! The tool is not particularly intuitive though.
You probably don’t recognize me because of the red arm.
Episode 9 Rewrite, The Starlight Project (Released!) and ANH Technicolor Project (Released!)
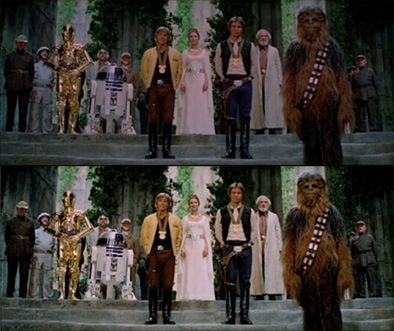
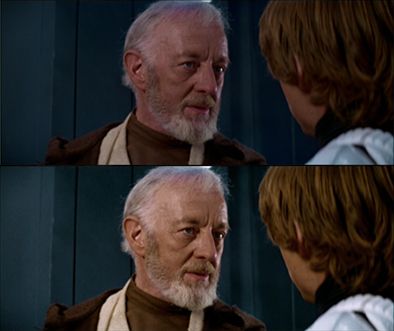
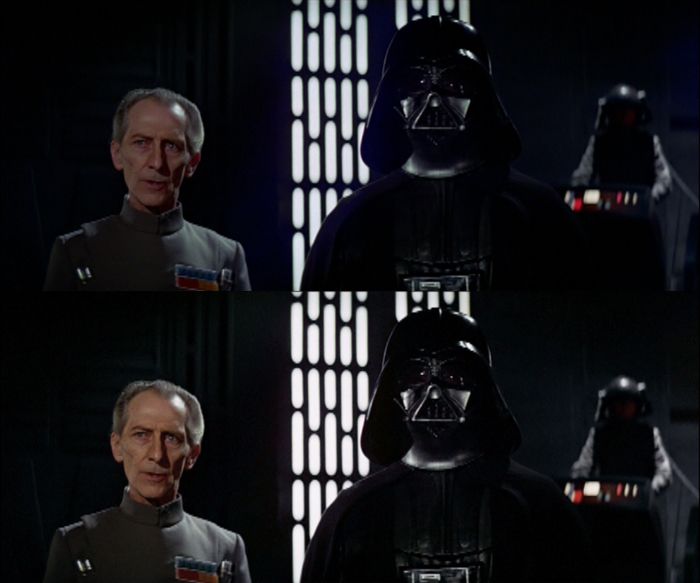
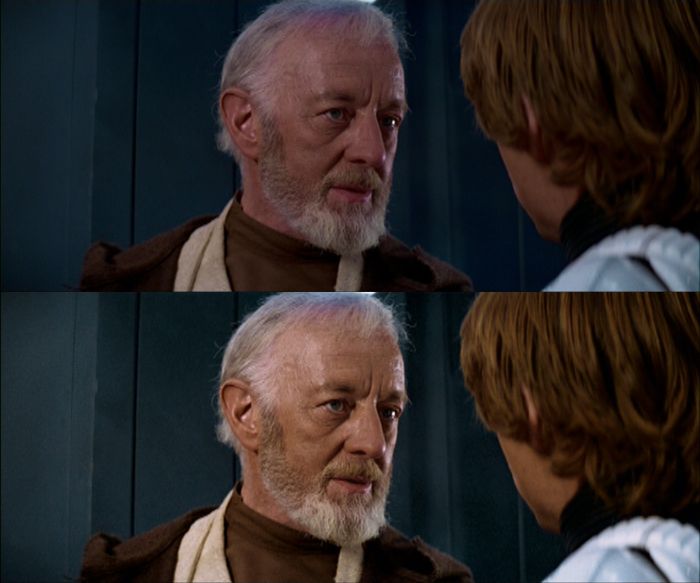
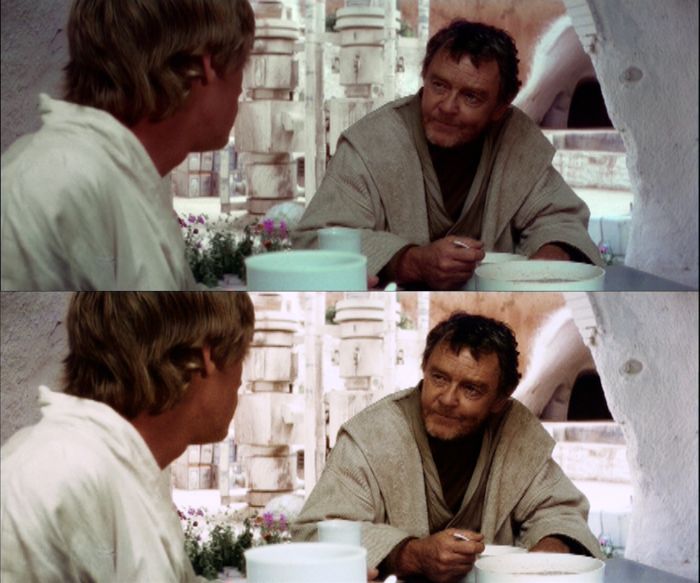
At long last the testing is done, and the settings are applied and rendered. They are rather complicated, but they don't blow out the highlights like previous attempts (Correction on bottom):
I'm finally happy with how the Burning Homestead scene has turned out, and the rest of the film is actually brighter than previous attempts
In comparing these settings to the Team Blu screenshots, it's remarkable how close this one is:

Full res pics to be uploaded soon, as usual. I'll also post the settings, though it's getting increasingly unwieldy to apply and render them. The last render took exactly 18 hours, compared to 5 on my single layer corrections!
You probably don’t recognize me because of the red arm.
Episode 9 Rewrite, The Starlight Project (Released!) and ANH Technicolor Project (Released!)
Password starwars.
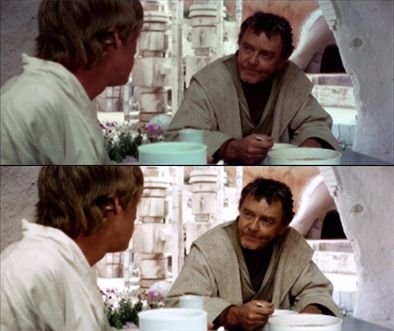
I often return to this photo of the Senator Technicolor print because the DVD differs so wildly:
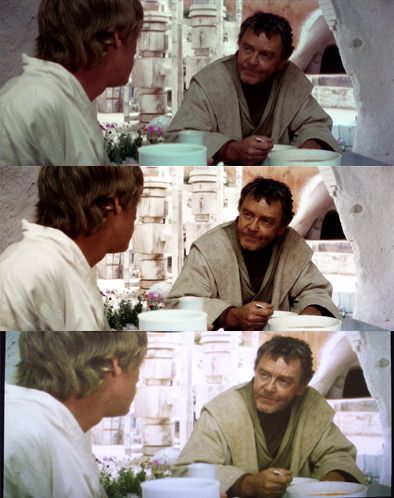
How does a cup go from green to blue between versions of the film? I figure that the blue cast is probably not entirely accurate to the scene, so I'm fine with a neutral white, but all three of these screenshots are very different from each other, and the GOUT is different again. Anyway, any thoughts and suggestions are always welcome.
Settings (to whom it may concern):
Copy the Star Wars video twice, so that you have 3 layers total, a top, middle, and bottom layer.
Top Layer: Set opacity to screen, enable Shadow/Highlight. Set highlight amount to 100, and the first four options below it to 50, and clip the black at 32%. Set all other sliders to 0. Channel Mixer (top to bottom): 77,10,10,0,5,90,5,0,-30,20,120,0. Adjust: Color: Lightness -25, Saturation -25, Gamma 28, Lighting (top to bottom) 100, -100, 0.
Middle Layer: Set opacity to screen, enable Shadow/Highlight. Settings are same as top layer, except with no black clip. Channel Mixer: 95,65,0,0,10,60,43,0,0,0,140,0. Adjust: Color: Lightness -25, Saturation -25, Gamma 15.
Bottom Layer: Image Control: Saturation 90, Shadow/Highlight: Highlight amount 20, all other options set same as middle layer. Channel Mixer: 90,5,-10,0,-3,95,30,-10,-3,83,0
Whew! Enjoy the fruit of those convoluted settings!
You probably don’t recognize me because of the red arm.
Episode 9 Rewrite, The Starlight Project (Released!) and ANH Technicolor Project (Released!)

Stupid question: Do you really use the DVD or do you use the 2004 HD Broadcast version? Because it would be more useful to have the HD Version color corrected. Like what Adywan did with ESB prior to his ESB:R work.

@NeverarGreat, really like your results, still think you should release this as its own version, even if you just post up a compressed version like i did with my final colour mix, just because it communicates the change over the whole film so much better than stills can

NeverarGreat, you should now be called AlwaysarGreat! Because these are great!
Best over-all color correction I've seen to date of the '04, and there's some pretty stiff competition.
-G
Thanks you guys!
@ TK: Not a stupid question! I had the WookieGroomer version of the HD broadcast at one point, but a computer virus wiped it out. However, I took some screenshots of it, and comparing them to the DVD version it looks like the DVD version is brighter and has better skin tones, as well as less-crushed black levels. However, this could be from many things, such as the WookieGroomer compression or something, but if the HD broadcast was exactly the same as the DVD version except in higher quality, then perhaps it would make more sense to use it or the Blu-ray. However, the main reason that I used the DVD version was to cut down on rendering times.
@ frank678: I'll consider it, if nobody else wants to use these settings for a future release (Despecialized 2.6? Maybe?).
@ g-force: LOL. Wait, there are other color corrections of the 04 DVD out there other than Adywan's and Harmy's? Where have they been hiding?
You probably don’t recognize me because of the red arm.
Episode 9 Rewrite, The Starlight Project (Released!) and ANH Technicolor Project (Released!)
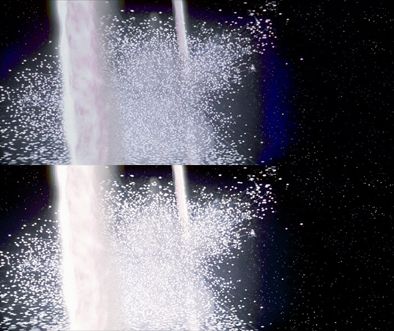
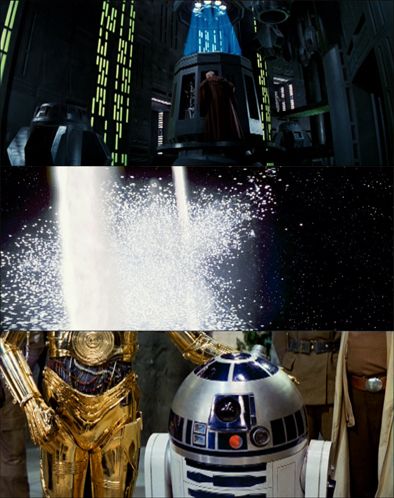
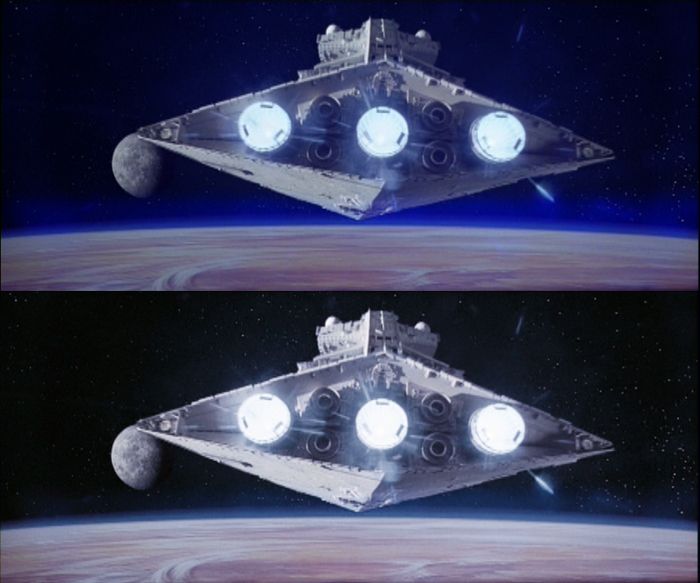
I revisited this endeavor a few days ago, wondering if I could remove that terrible blue ring from around the Death Star explosion on the DVD version. I realize that this was "fixed" for the Blu-ray, but my thinking was that this blue ring was part of a systemic problem with the entire movie. Previous attempts to remove it with a global change had failed, or had pulled all blue from the movie. So I came up with a more surgical approach:
Starting over with an unaltered base movie layer, I pulled up the values of the green and red in the channel mixer, in order to blow out the luminance. The layer on top of that was set to saturation blending mode, meaning that the luminance and hue was carried over from the base layer, with the saturation of the blending layer. To this layer I brought the saturation down to zero, meaning that now I was left with an image that was black and white, but with no saturation and blown out luminance. Finally, a third and final layer was set to "Darker Color" blend mode and placed on top of this black and white image. Now because the blue and red tones are the result of oversaturation, bringing the saturation to zero in the second layer had the result of targeting the blown out tones and making them darker. When darker color was applied to the top layer, the oversaturated colors were erased, while keeping the overall color balance of the DVD:
There's still some blue remaining, but this is still much improved over the original. I checked some other scenes next, and found that R2 had become much less blue:
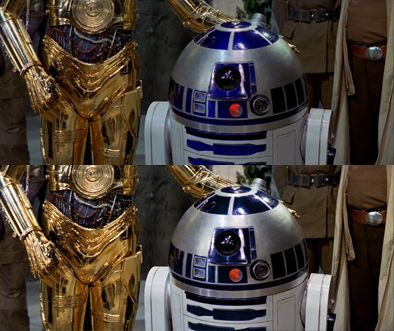
I thought that this couldn't be right until I went and checked it against the Mike Verta frame found elsewhere on this blog. Turns out that R2 is actually this shade of blue!
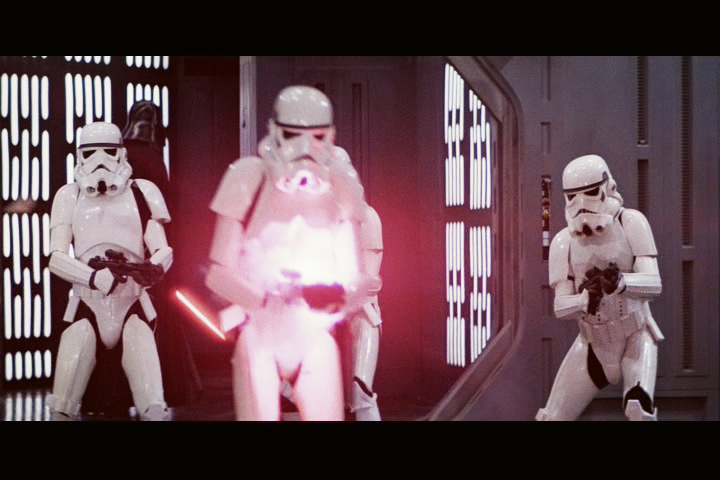
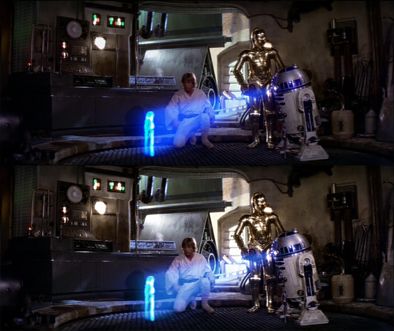
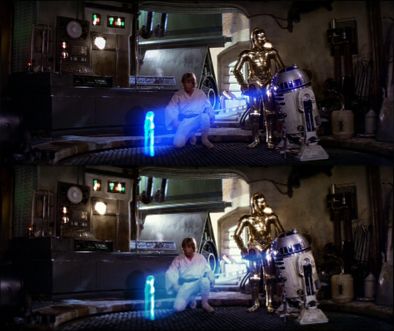
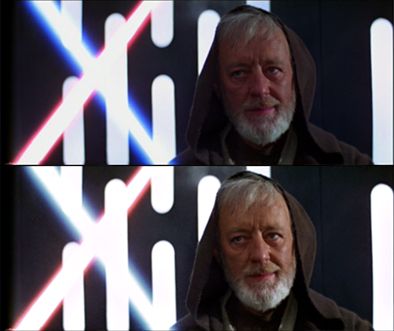
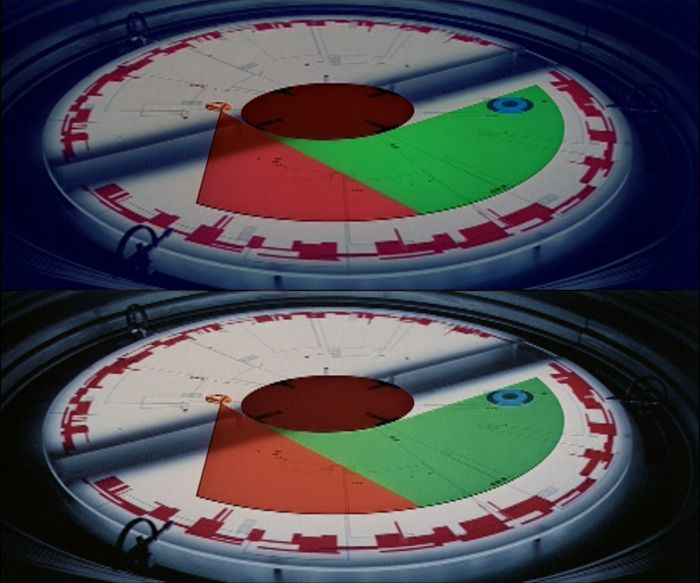
There are many improvements in many scenes, such as the hologram scenes:
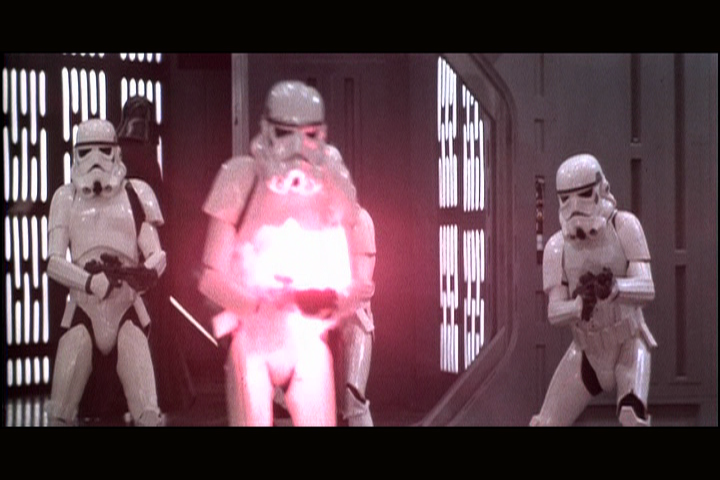
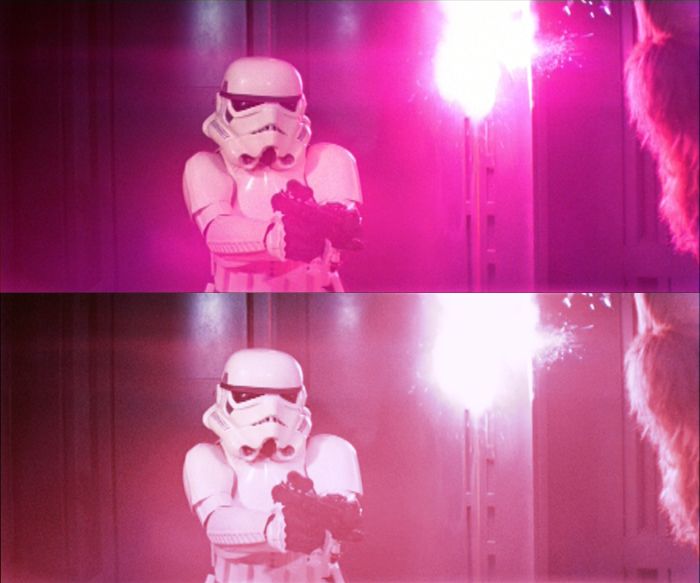
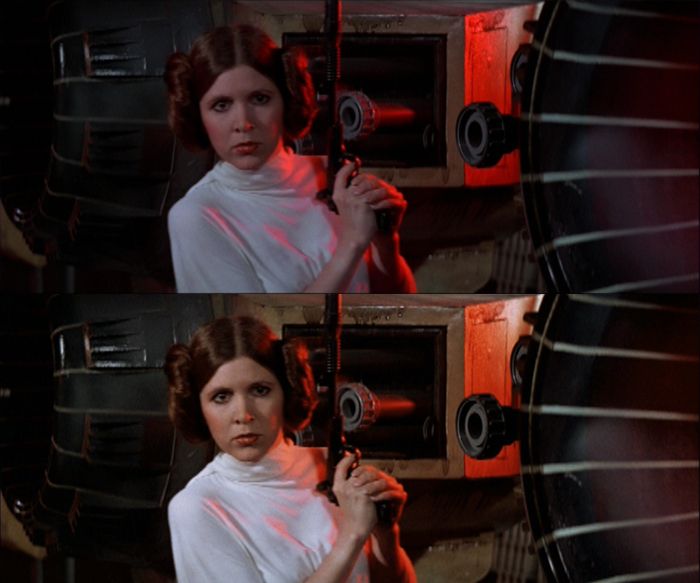
There are some blown out reds in the film, such as when Leia is hiding from stormtroopers at the beginning, and these are brought under control as well with this change.
The one problem with this technique is that some of the highlights are messed up, but this technique is still a work in progress
You probably don’t recognize me because of the red arm.
Episode 9 Rewrite, The Starlight Project (Released!) and ANH Technicolor Project (Released!)

Excellent work, NeverarGreat.
A picture is worth a thousand words. Post 102 is worth more.
I’m late to the party, but I think this is the best song. Enjoy!
—Teams Jetrell Fo 1, Jetrell Fo 2, and Jetrell Fo 3

Wow, the results are coming along really well with this. I would love to see this in motion one day. Keep up the good work!
Thanks all!
I'm at a bit of an impasse right now, as the brightness boosting technique of using "screen" on several layers and this newest technique seem to be mutually exclusive. Meaning that I can remove the blue, but I can't fix the brightness without putting an unaltered video stream above the rest of the video streams, thus reintroducing the blue that I've worked so hard to remove. I'm sure there's an answer, other than rendering the video and then re-importing it to fix the brightness, which might be a mess.
Anyway, I'm glad people are interested in the work, and hopefully something will be useful for other projects at some point.
Onward!
You probably don’t recognize me because of the red arm.
Episode 9 Rewrite, The Starlight Project (Released!) and ANH Technicolor Project (Released!)
I *think* part of the problem you are running into is that you correctly want to brighten the violet, and darken the blues, but you are darkening the blues by darkening all that is super-saturated, which contradicts what you are doing to the violet. Might need to re-think the workflow. I wish I had experience with Premier, as you seem to be on the right track, but I can't provide any constructive feedback.
-G
That's kind of what is happening, I think. However, the violets remain even after removing the oversaturated blues and reds, so they have high luminance already, just not quite enough to push them into the highlights. So I think that the violets can be fixed with added luminance, whereas the oversaturated reds, and especially the blues, have no corresponding luminance and shouldn't be there. If that makes any sense.
I was thinking about this problem last night, and this morning I realized that it was much simpler than I was making it out to be. It turns out that you could stack as many video layers as you want to get to the correct brightness and then put one more layer on top to remove the oversaturation in the blues and reds.
Do accomplish this, all you need to do is isolate the offending saturation by bringing the brightness of the image down to zero and optimizing the isolation with the gamma level. This essentially deletes everything in the image except for oversaturated colors, and from there you can use the channel mixer to delete some of the red or blue from the isolated colors to soften the effect. Then simply set the blending mode to subtract, and it eliminates the problem areas, and does it better than my previous convoluted method:
Here are some examples without comparison, to save space:
I haven't completely fixed the highlights yet, but it's getting there hopefully.
You probably don’t recognize me because of the red arm.
Episode 9 Rewrite, The Starlight Project (Released!) and ANH Technicolor Project (Released!)
Can you post an example with some fleshtones with this new method I'm intrigued!
Sure, I was about to show today's progress. Unfortunately, Premiere Elements apparently can't do a screenshot of a layer with subtract as a blend mode, so I am taking screenshots right from my monitor. It will therefore not be exact.
You can really see in this last shot how the blue saturation has been taken way down. There's still blue there, but it's not "pooling" on the image like in the DVD. These images are the result of three layers. I attempted to pull up the violets while keeping the greens in the shadows, and the result is much closer to the Senator I think.
You probably don’t recognize me because of the red arm.
Episode 9 Rewrite, The Starlight Project (Released!) and ANH Technicolor Project (Released!)
Yes getting rid of that blue fog puts so much more life back in the picture, and you've done it without blowing things out which is what I always ended up doing. Nice subtle skintones too!
I've just added a link to the video on the first page. To get it to under 500 mb in good quality, I had to chop it up, but I tried to get a good cross section of scenes, such as the Binary Sunset, Burning Homestead, Lightsaber Duel, Trench Run, Medal Ceremony, etc. So go check it out and leave some feedback!
You probably don’t recognize me because of the red arm.
Episode 9 Rewrite, The Starlight Project (Released!) and ANH Technicolor Project (Released!)
Its pleasing to my eye to see the offensive magenta/blue soup the original was swimming in converted to a more naturalistic pallette, I'd much rather see simple brown and blue tones than shocking pink/purple ones jumping out.

Dang, that's good stuff. And that's just one overall color correction? Really good job.
I'm happy with the settings at this point, so I'll be putting them here soon. Meantime, Here are some more shots that benefit substantially from the blue removal and the new settings:
You probably don’t recognize me because of the red arm.
Episode 9 Rewrite, The Starlight Project (Released!) and ANH Technicolor Project (Released!)
I've been fiddling with the settings yet again, and I've gotten substantial amounts of blue into the highlights while keeping it out of the shadows, so the above screenshots are not much changed.
I don't think that I can make a greater global change to this red without killing the skin tones, so I'm happy with this level of red. At least most of the purple is gone.
The red bleed is practically gone. (look up at the screen from a low angle to see what I mean)
Note in particular the blue in the lower right corner on the wall, and the greenish highlights on the armor.
There is now some blue bleed in the highlights of this frame, something which appeared to a greater extent on the Senator photo. I've tried to go for a more subdued effect here.
Again, the entire movie uses the same settings. I'm tempted to correct scene by scene, but where's the challenge in that?
You probably don’t recognize me because of the red arm.
Episode 9 Rewrite, The Starlight Project (Released!) and ANH Technicolor Project (Released!)
That is amazing work for one-pass color correction.