Discussed in the V8 thread a while ago, but I've recently thought of something which may be worth considering.
Normally I advise calibrating black and white points (aka brightness and contrast) in the capture card driver settings, so that no tweaking is required before encoding.
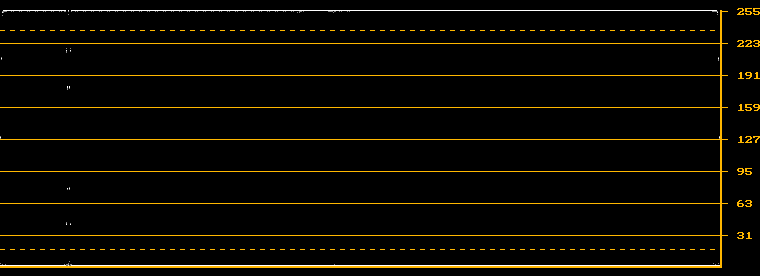
Over the weekend I was playing with an image that contains only video black and peak white (the needle pulse pattern on Video Essentials):

If you look at the luma levels of the image ripped directly from the DVD, you can see thin lines at 0 for black and 255 for white (this is after conversion to RGB, the actual range is of course 16-235):
Here's a capture of the same pattern from laserdisc; the analogue noise has the effect of making the black and white lines much thicker and fuzzier (ignore the stuff between black and white, that's just some grey text present on the laserdisc version):
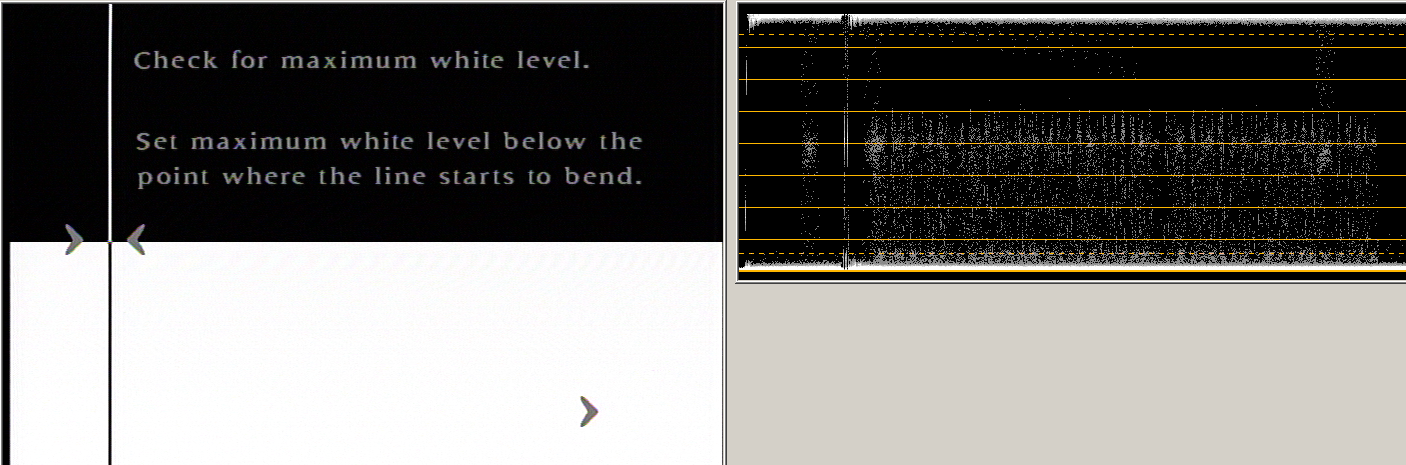
Brightness and contrast have been adjusted so that 0 lies in the centre of the "black" line, and 255 lies in the centre of the "white" line. But then I started thinking: what if you are planning to use the multiple capture averaging technique to reduce analogue noise? In setting the black and white points like this, you have imposed a hard limit on everything "above white" and "below black". Surely this will skew the result of the average luma calculation?
Now, take a close look as these plots:
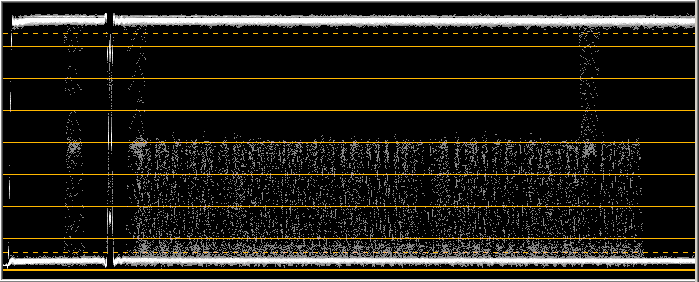
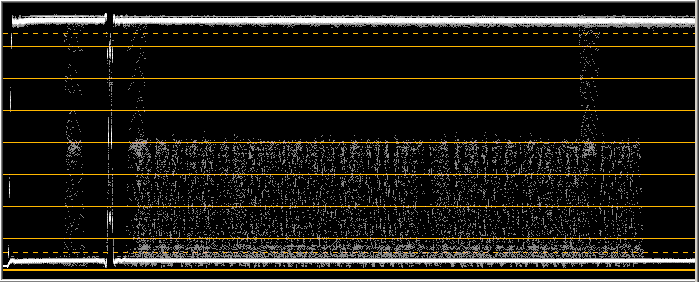
In the first image, the black and white points are set so that the majority of stray noisy pixels above white and below black are captured. The second image shows the effect of a 5x capture average (actually it's just TemporalSoften(2,255,255) applied to a still frame capture, but effectively the same thing). You can see that the averaging has the affect of making the lines thinner (more noticeable in the lower line that represents black), which means less variation/noise. (It'd be interesting to see this frame captured from an X0 - apparently it has 5 NTSC decoders in parallel, giving you the noise reduction advantages of averaging in a realtime output.)
The final step would be to tweak the brightness and contrast in your script, after the averaging stage.