
- Time
- Post link
can you fix the issues with transformers the movie 1986 the contrast is too high and i think it might have dnr this is the shout release i’m talking about
can you fix the issues with transformers the movie 1986 the contrast is too high and i think it might have dnr this is the shout release i’m talking about

I am only trying to display a technique for crushed blacks really. And I wanted to move on to blown highlights I hope it’s helpful to people.
DNR is a different beast all together. I don’t know any tricks for that. I’m not sure weather this would also work to make something not look not like plastic or waxy or smooth with DNR. I would say you have to find a different version without it but here mixing the 2 as a whole image might take some of that away by making it simply opaque.
from dvdactives review of the blu ray
The 4K scan pays off in terms of clarity and detail, but the difference in colour timing between the two transfers is the more immediate issue. Without getting into which transfer is ‘correct,’ because I have no idea, I’ll just say that I like the Shout transfer’s richer colours, especially the vivid oranges and slightly lavender reds, but I also recognize that the Metrodome disc’s palette is closer to other DVD versions of the movie. The next issue is the overall levels of each release. Watching it on a big TV screen, the new transfer’s contrast looks nice. The subtle highlights reveal more shading in the hand-painted backgrounds and ensure that accompanying lighting effects – laser blasts, surreal starscapes, and computer console readouts – really stand-out against the hand-drawn panels. The Metrodome transfer’s highlights seem to crack up some of the ink outlines, too. Shout Factory’s darker overall tint is fine, but there’s a lot of detail missing in the moody shots, due to soupy shadows and greyish blacks. Chris’ theory is that the image was mastered using PC levels (0=black, 255=white), instead of television levels (16=black, 235=white), which makes sense. I found that I could pretty easily mitigate the problem by sticking the caps in Photoshop and sliding the middle RGB input a tad to the left. Shout Factory had the visual information they needed; something just went wrong during production. The print damage and general wear is a bit more prevalent than expected, considering the extensive remastering, though compression artefacts are minimal, in part because Shout Factory separated the 1.85:1 and 1.33:1 transfers onto separate discs. I actually find the grain and scratches charming, myself – they add character to this plucky movie.
It’s a great old cartoon and i remember it fondly. Good music too!
I don’t have this release sadly and it’s one to add to the collection at some point. All the controvesy about optimus primes censored death though.
Do you have screen capping capabilities?
I hate it that we don’t get shout factory releases in the Uk too.
I was going to talk about fixing blown highlights when no alternative source is available but not today bit tired now…
this all i seem to be able to do here the dvdactive link http://www.dvdactive.com/reviews/dvd/transformers-the-movie-30th-anniversary-edition.html
This is all simply bad values so not enough mid range vslue and possibly a bit of push of value at the bottom.
Somone who said about magenta hotrod yeah go with that color. Change the value on shots when they go dark like that so value remains more consistant not jumping up and down. It is very easy to remedy and does not require you to mix any images together.
Ok so looking at the technique I used for trying to undo black crush one of the parts I think I went wrong with was the screen capping and not changing the Gout to be anamorphic and my screen resolution being a different size to the actual video source. At the end of the day I would not be doing this technique using screen caps if I was doing it to actually get a result for a project. But as a demo it is good enough to demonstrate how to.
This technique can be used to replace highlights from an alternate source but you would need to switch / invert the Luma key to focus on highlights. (My software does not have this option).
So talking about blown highlights when you have blown highlights in every source and there is no replacement to key in as it’s a problem when the filming took place not the transfer.
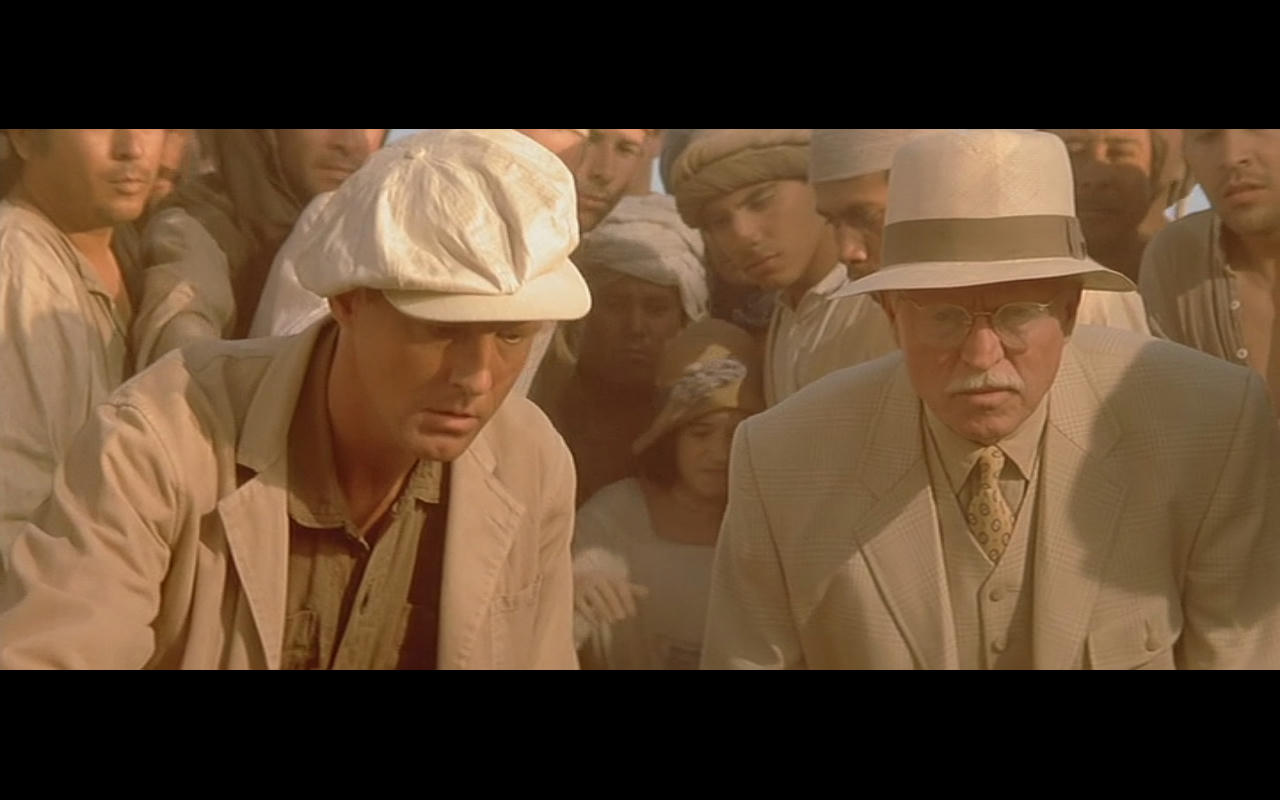
This shot just really annoyed me because of the guys hat and it would always draw my eyes to his hat rather than anything else. So I had no alternative replacement but I really wanted to deal with this issue.
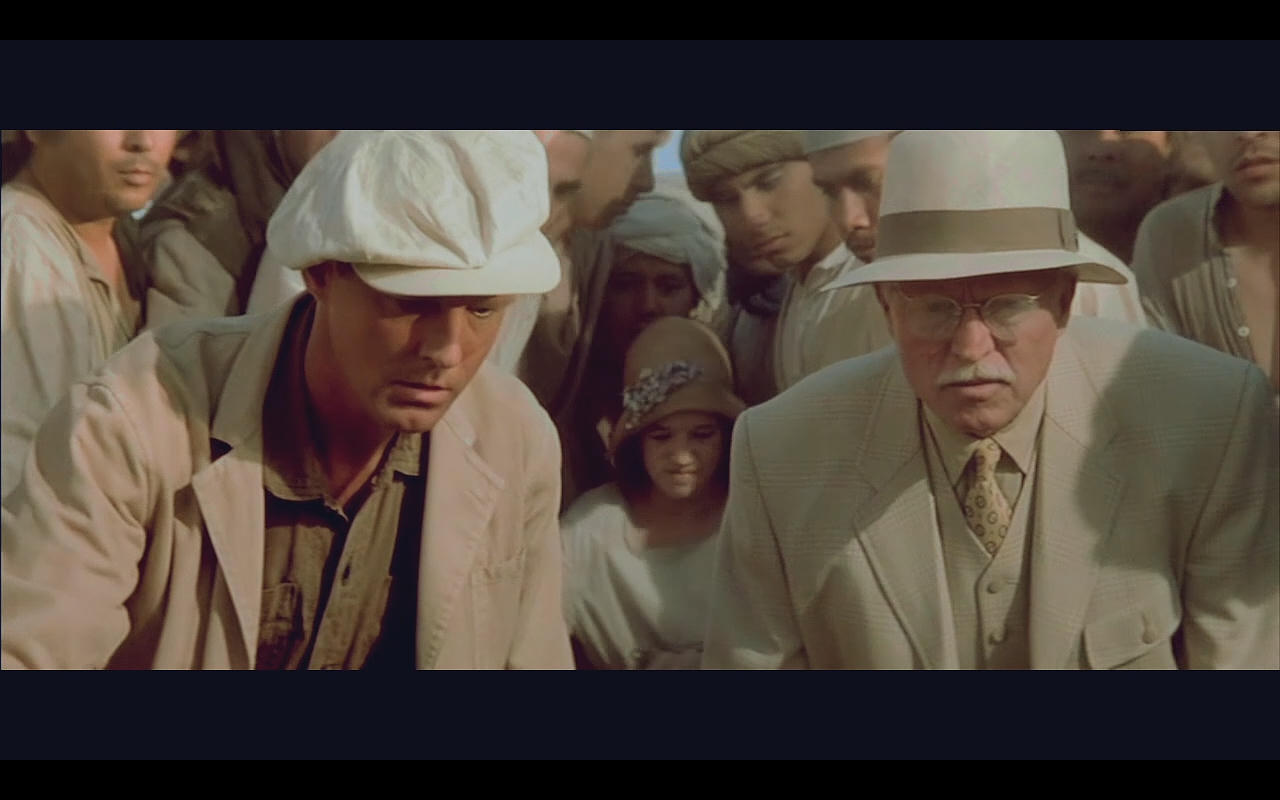
This was the eventual fix. Something I am not personally too keen on using as it generally messes things up… But in terms of dealing with blown highlights when you have no alternative version to draw from it does a pretty good job of lessening the problem. Basically the process was color correct the footage how you want it. Then add selective correction to blown parts. I think this had six counts of selective correction to bring down the whites to a level that matched the rest of the hat and also de-saturation on the blown hues. This then made this problem far more subtle rather than glaring in your face fluro hat. Afler this was done I rendered the clip and then put this rendered clip in the timeline as a replacement and color corrected again after this process was done. This is very much a hammer and chisel approach to dealing with blown highlights when you have no alternative but want to fix it somehow. Bear in Mind that the contrast needs fixing on this also but it is more or less the finished shot.
So there is an interesting way to deal with the no alternative source for blown highlights. Shadows or black obviously you can not do this with.
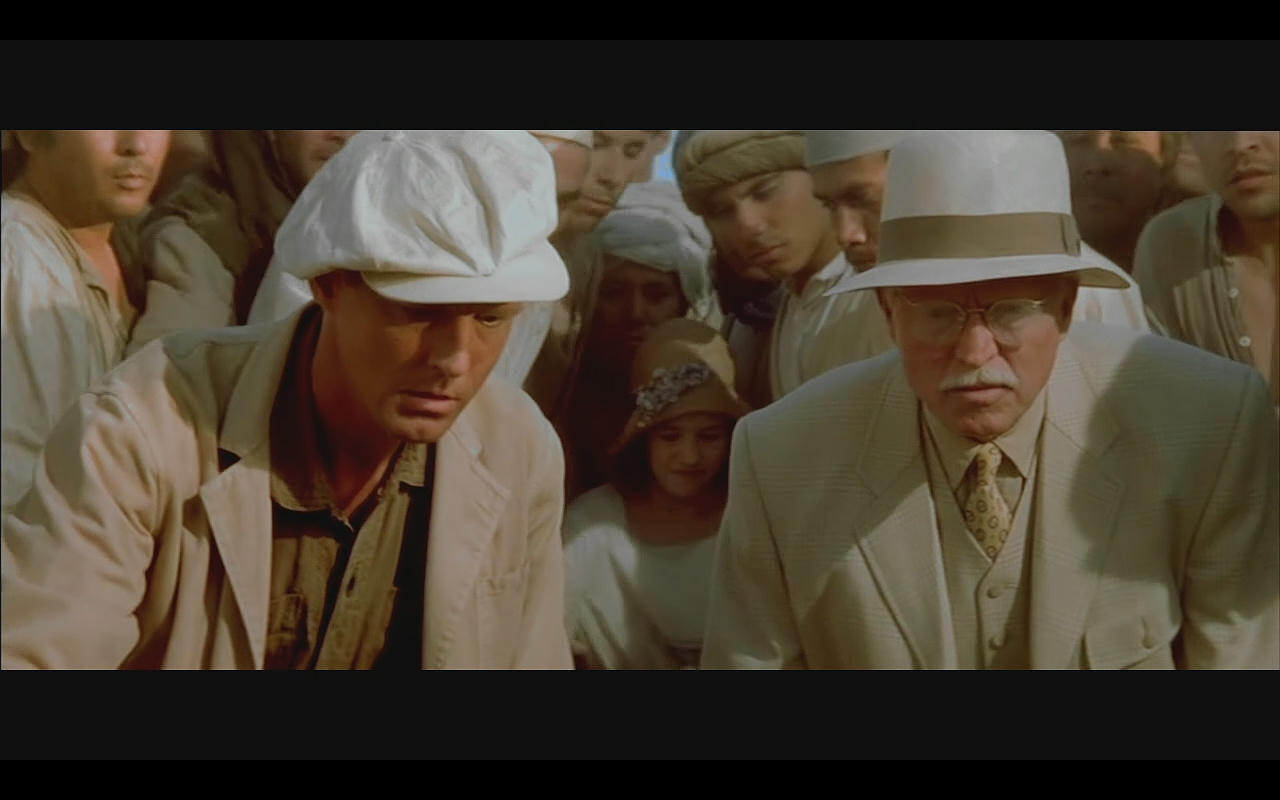
Best I could do finished shot