msycamore said:
I'm gonna do this bad boy justice. It's just that lack of time and motivation that gets in the way.
And here I've thinking up new ways to make more work for you! Better swallow hard before reading on ... :)
When I first came across Puggo - Jar Jar's Yoda's Puggo GRANDE project using a WorkPrinter 16 for 16mm film capture ...
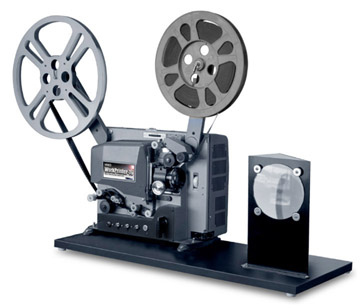
... I noticed color fringing on his samples and on samples from the manufacturer's (MovieStuff) website. Unfortunately, the capture he made for you suffers from the same color fringing:

Notice the bluish color (typical for "chromatic aberration") showing at the high contrast, outer edges (the boy's shoulder and SEN's neckline & the back of his head). The suspect of this crime is the huge lens on the WorkPrinter that focuses the film frame into the capture camera. This "simple" (single-element) lens focuses the colors of the light spectrum at fractionally different distances, causing the aberration:

https://en.wikipedia.org/wiki/File:Chromatic_abberation_lens_diagram.svg
A multi-element lens would correct this but it would also be much more expensive, especially with a lens that big.
The problem is the R/G/B components of the picture are no longer the same size. Like Goldilocks And The Three Bears, the RED is too big (and slightly out of focus), the BLUE is too small (and slightly out of focus), but the GREEN is just right (and in focus). In this R/G/B separation ...

... notice that the RED edging seems to be the reverse of the BLUE edging (the GREEN, of course, has no edging). This indicates the GREEN is in focus and the proper size. The other 2 need correction.
The solution is simple -- resize the BLUE and RED separations to create a chromatic aberration correction. I did this by
- SEPARATING the captured frame (720x480) into R/G/B components
- RESIZING up the BLUE to 726x484 and CROPPING the larger result back to 720x480
- RESIZING down the RED to 718x478 and BORDERING the smaller result back to 720x480
- COMBINING the new R/G/B components into a corrected frame
CHROMATIC ABERRATION CORRECTION


For this "proof of concept", I worked on the full-sized frame. However, it should be applied to a double-sized frame to allow for "single pixel" resizing while keeping the picture elements centered. Otherwise, you may end up with a single-pixel-shift error (as I did here on the RED separation -- producing a RED fringe at the farthest right edge of the picture).